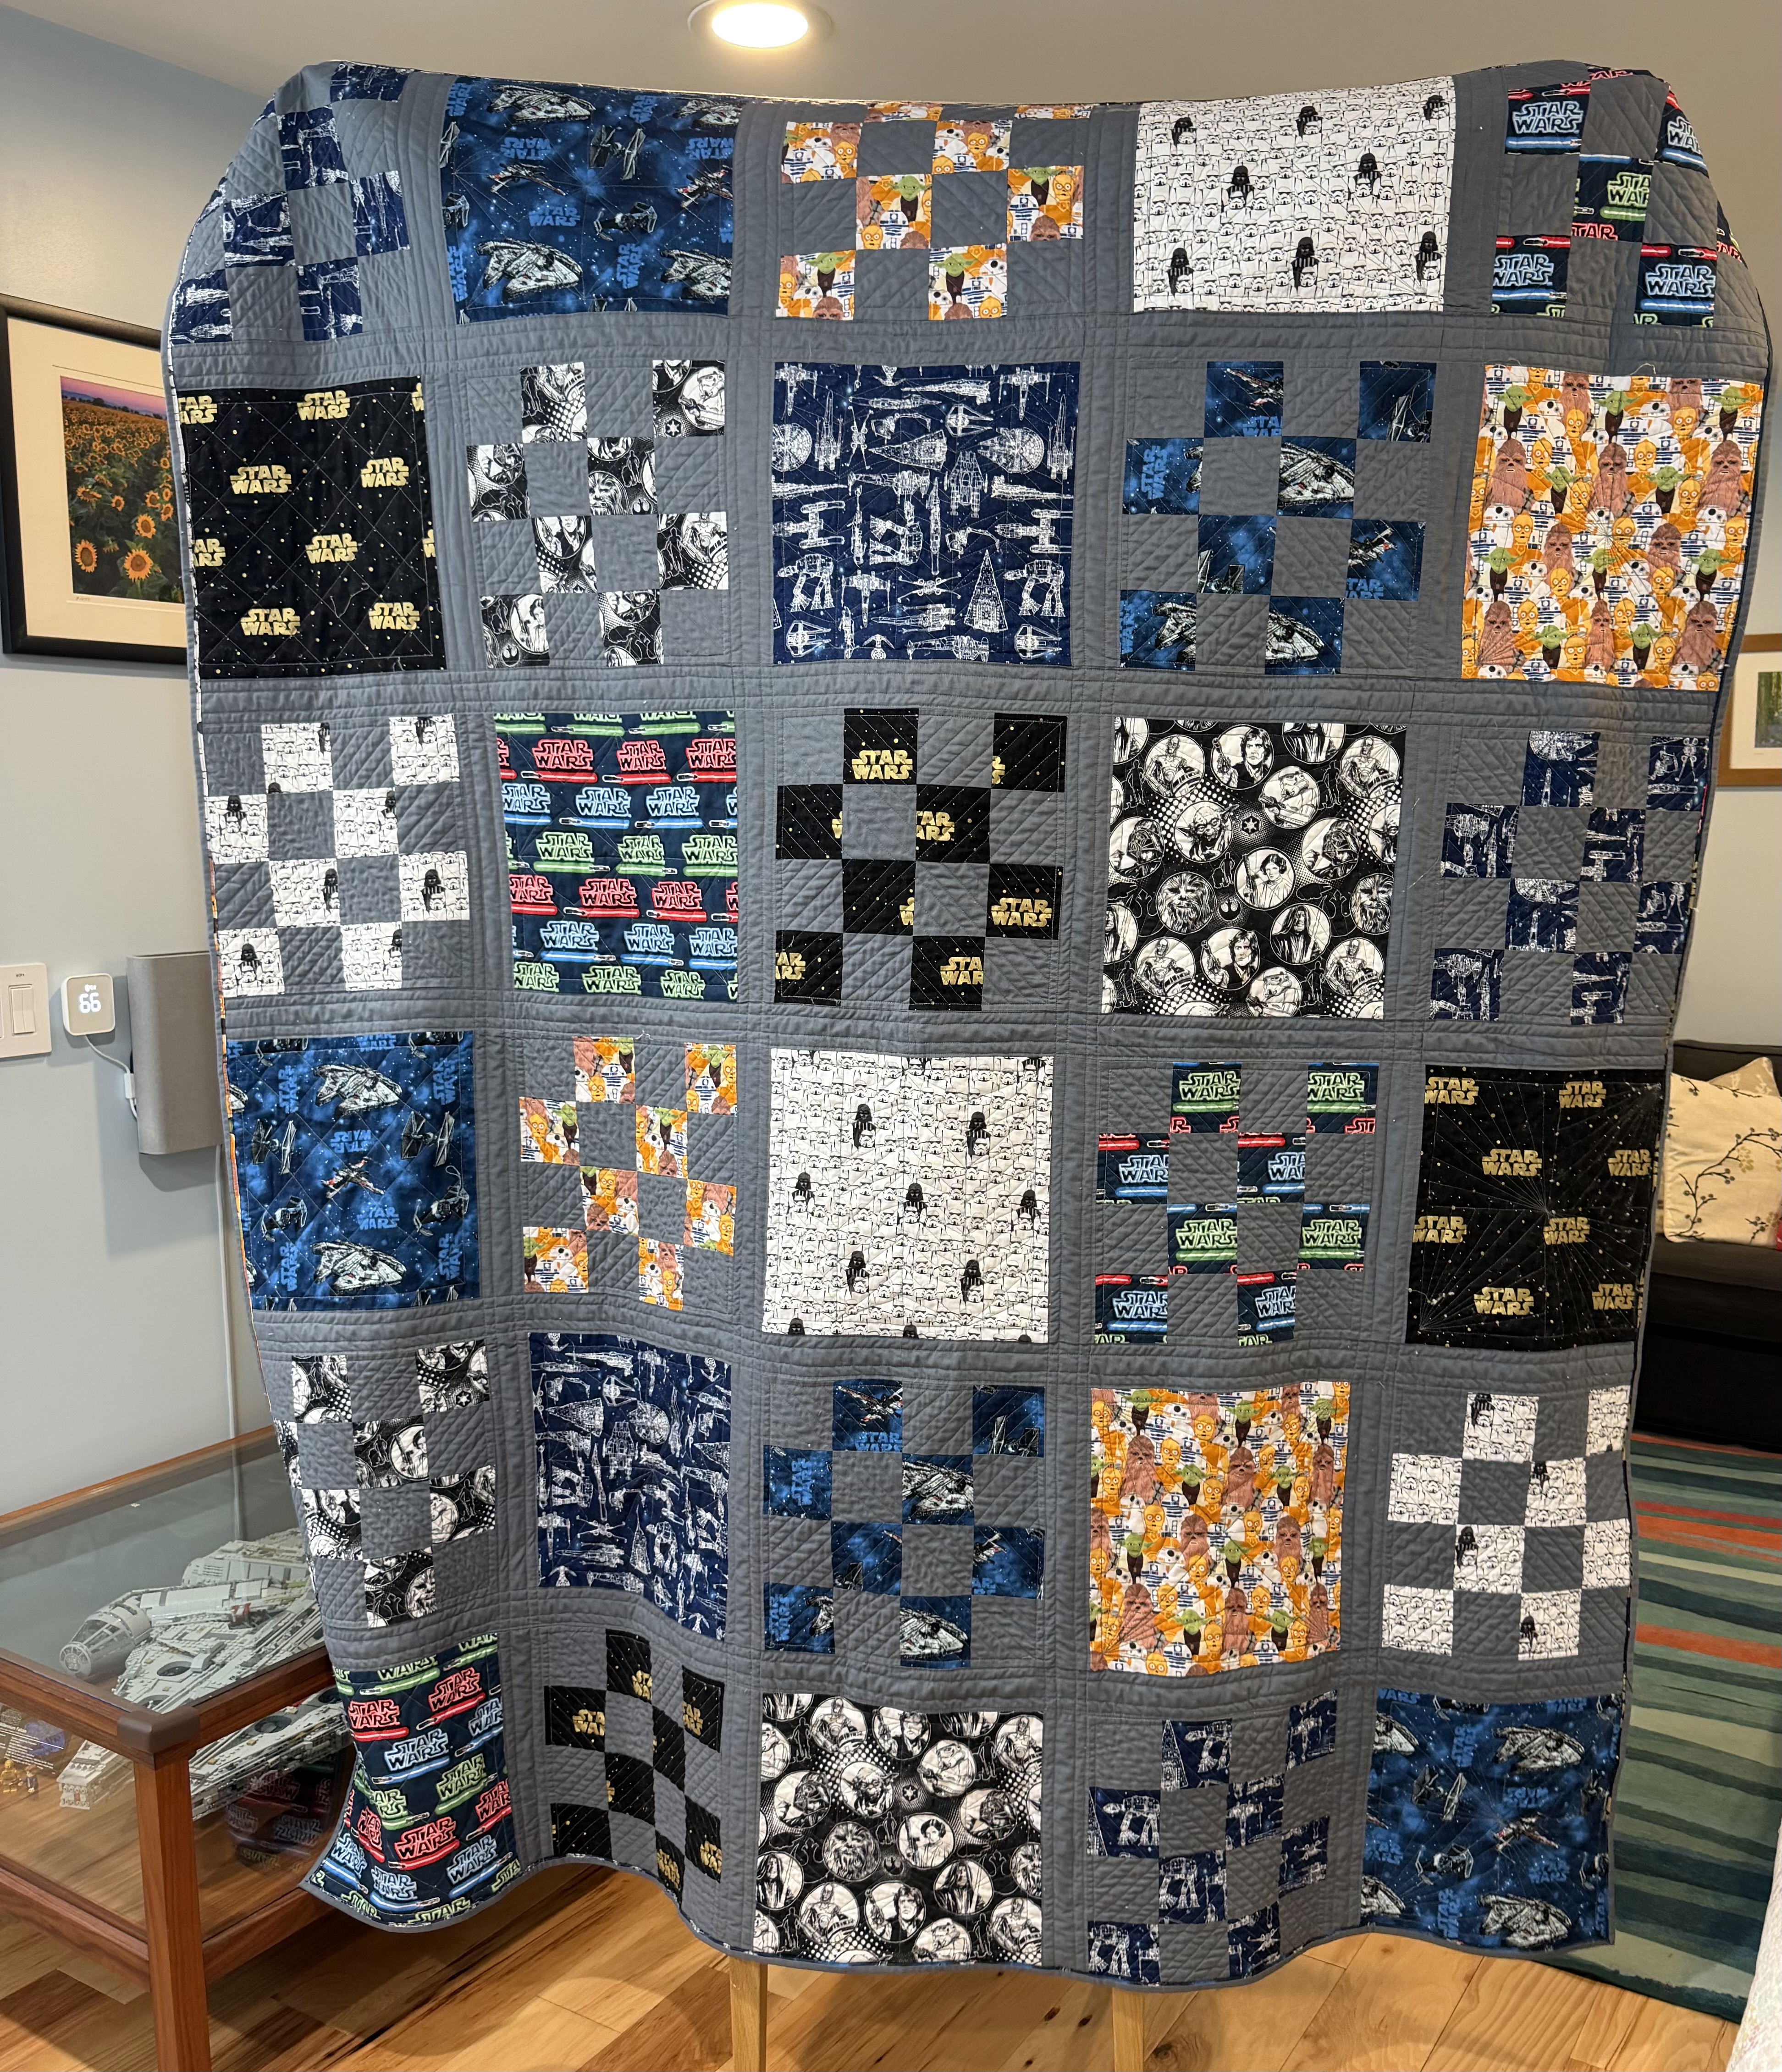
Once I had finished my last quilt, my husband then asked me to make him one too… but with Star Wars fabric. As Joann Fabrics is now very much departed, I hit up my local Michael’s for all the Star Wars fabric they had in stock, which was actually quite a lot.
Most of the patterns are directional however, so with all the different styles of blocks in the Ultimate Beginner’s Quilt I thought… hmmm no, let’s be kind to ourself and……. not. This freebie pattern popped up linked from a Hawthorne Supply Co email, and seemed like a much more sensible option.
I picked 7 of the different Star Wars fabrics on offer (the minimum cut length is 1 yard so I now have plenty for any other extras I might want to make!) and some graphite Kona solid fabric for the background and binding.
The instructions are pretty simple and straightforward, although with an error in the cutting table (you need 2 of piece A2 for each 16-patch block). Each of my 16-patch blocks measured more like 12 1/4″ than 12 1/2″, so I suspect a scant 1/4″ seam might be better to get the 12 1/2″ block size required!
Again I used a low-tech spreadsheet to lay out my block options, and it ended up looking like this:
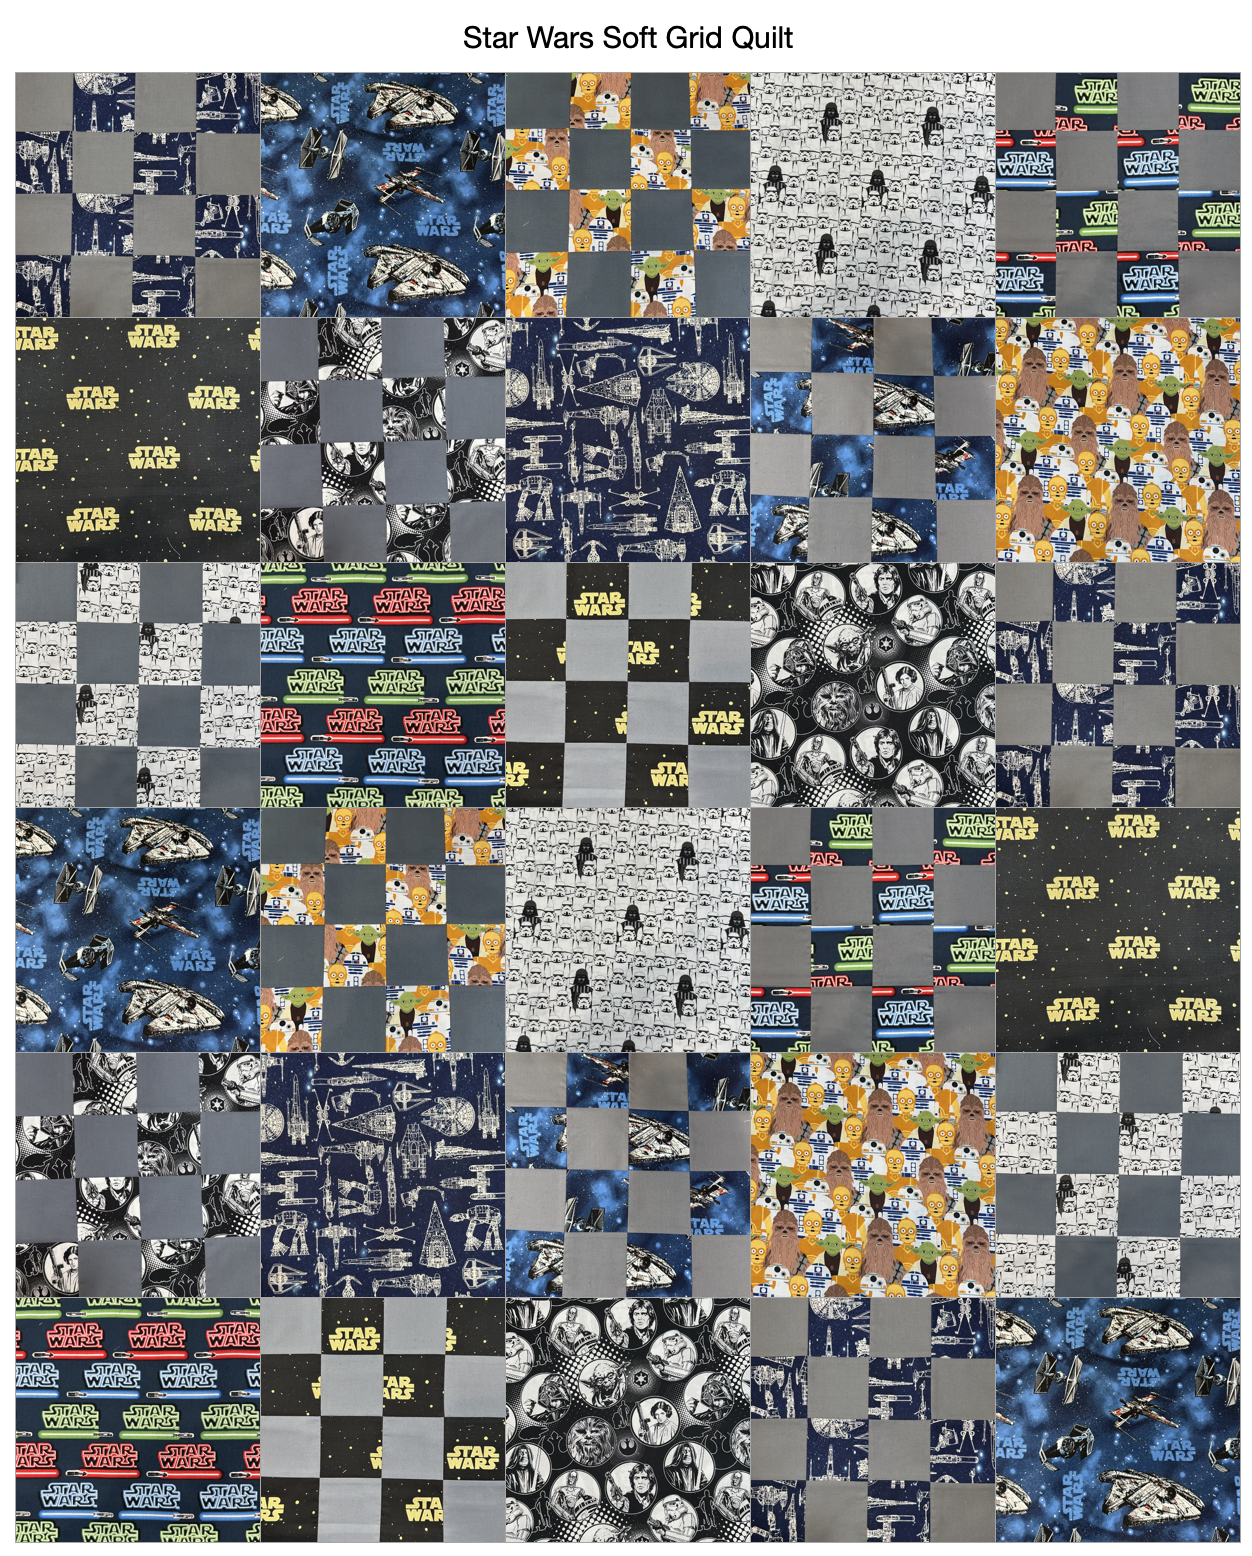
Somewhat busy on the eyes! So I decided to break up the patterns with some sashing in the background fabric, mocked up it looked more like this:
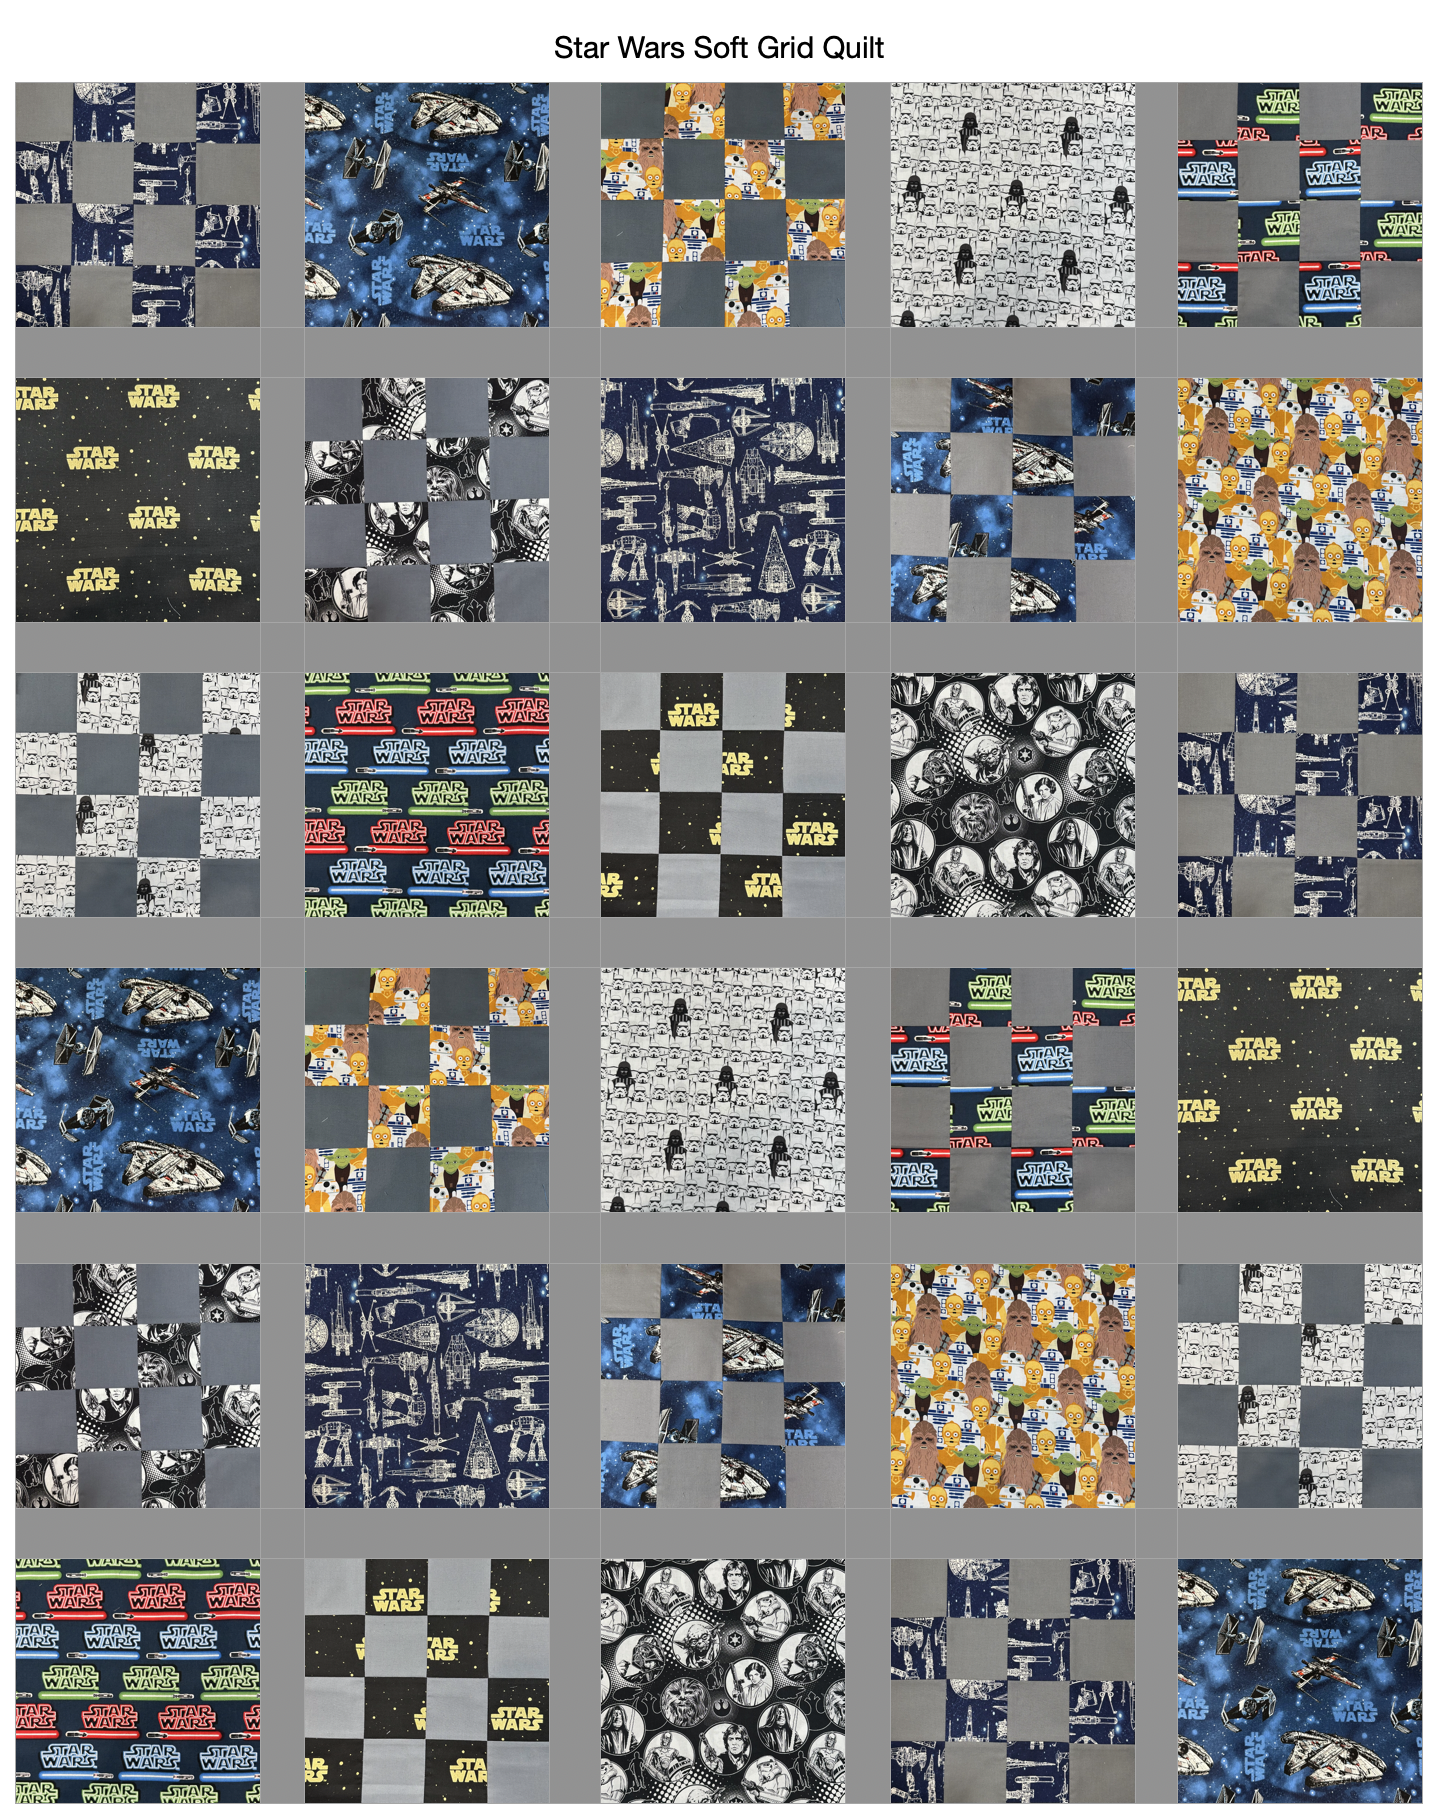
With a little bit of gentle maths I figured out that I needed to cut (24) 2 1/2″ x 12 1/4″ pieces = (8) 2 1/2″ x WOF strips, each sub cut into (3) 12 1/4″ pieces to join the blocks across the rows, and (5) 2 1/2″ x 69 1/4″ pieces = (10) 2 1/2″ x WOF strips, where 2 or each are joined together and cut into 69 1/4″ pieces to go between each row.
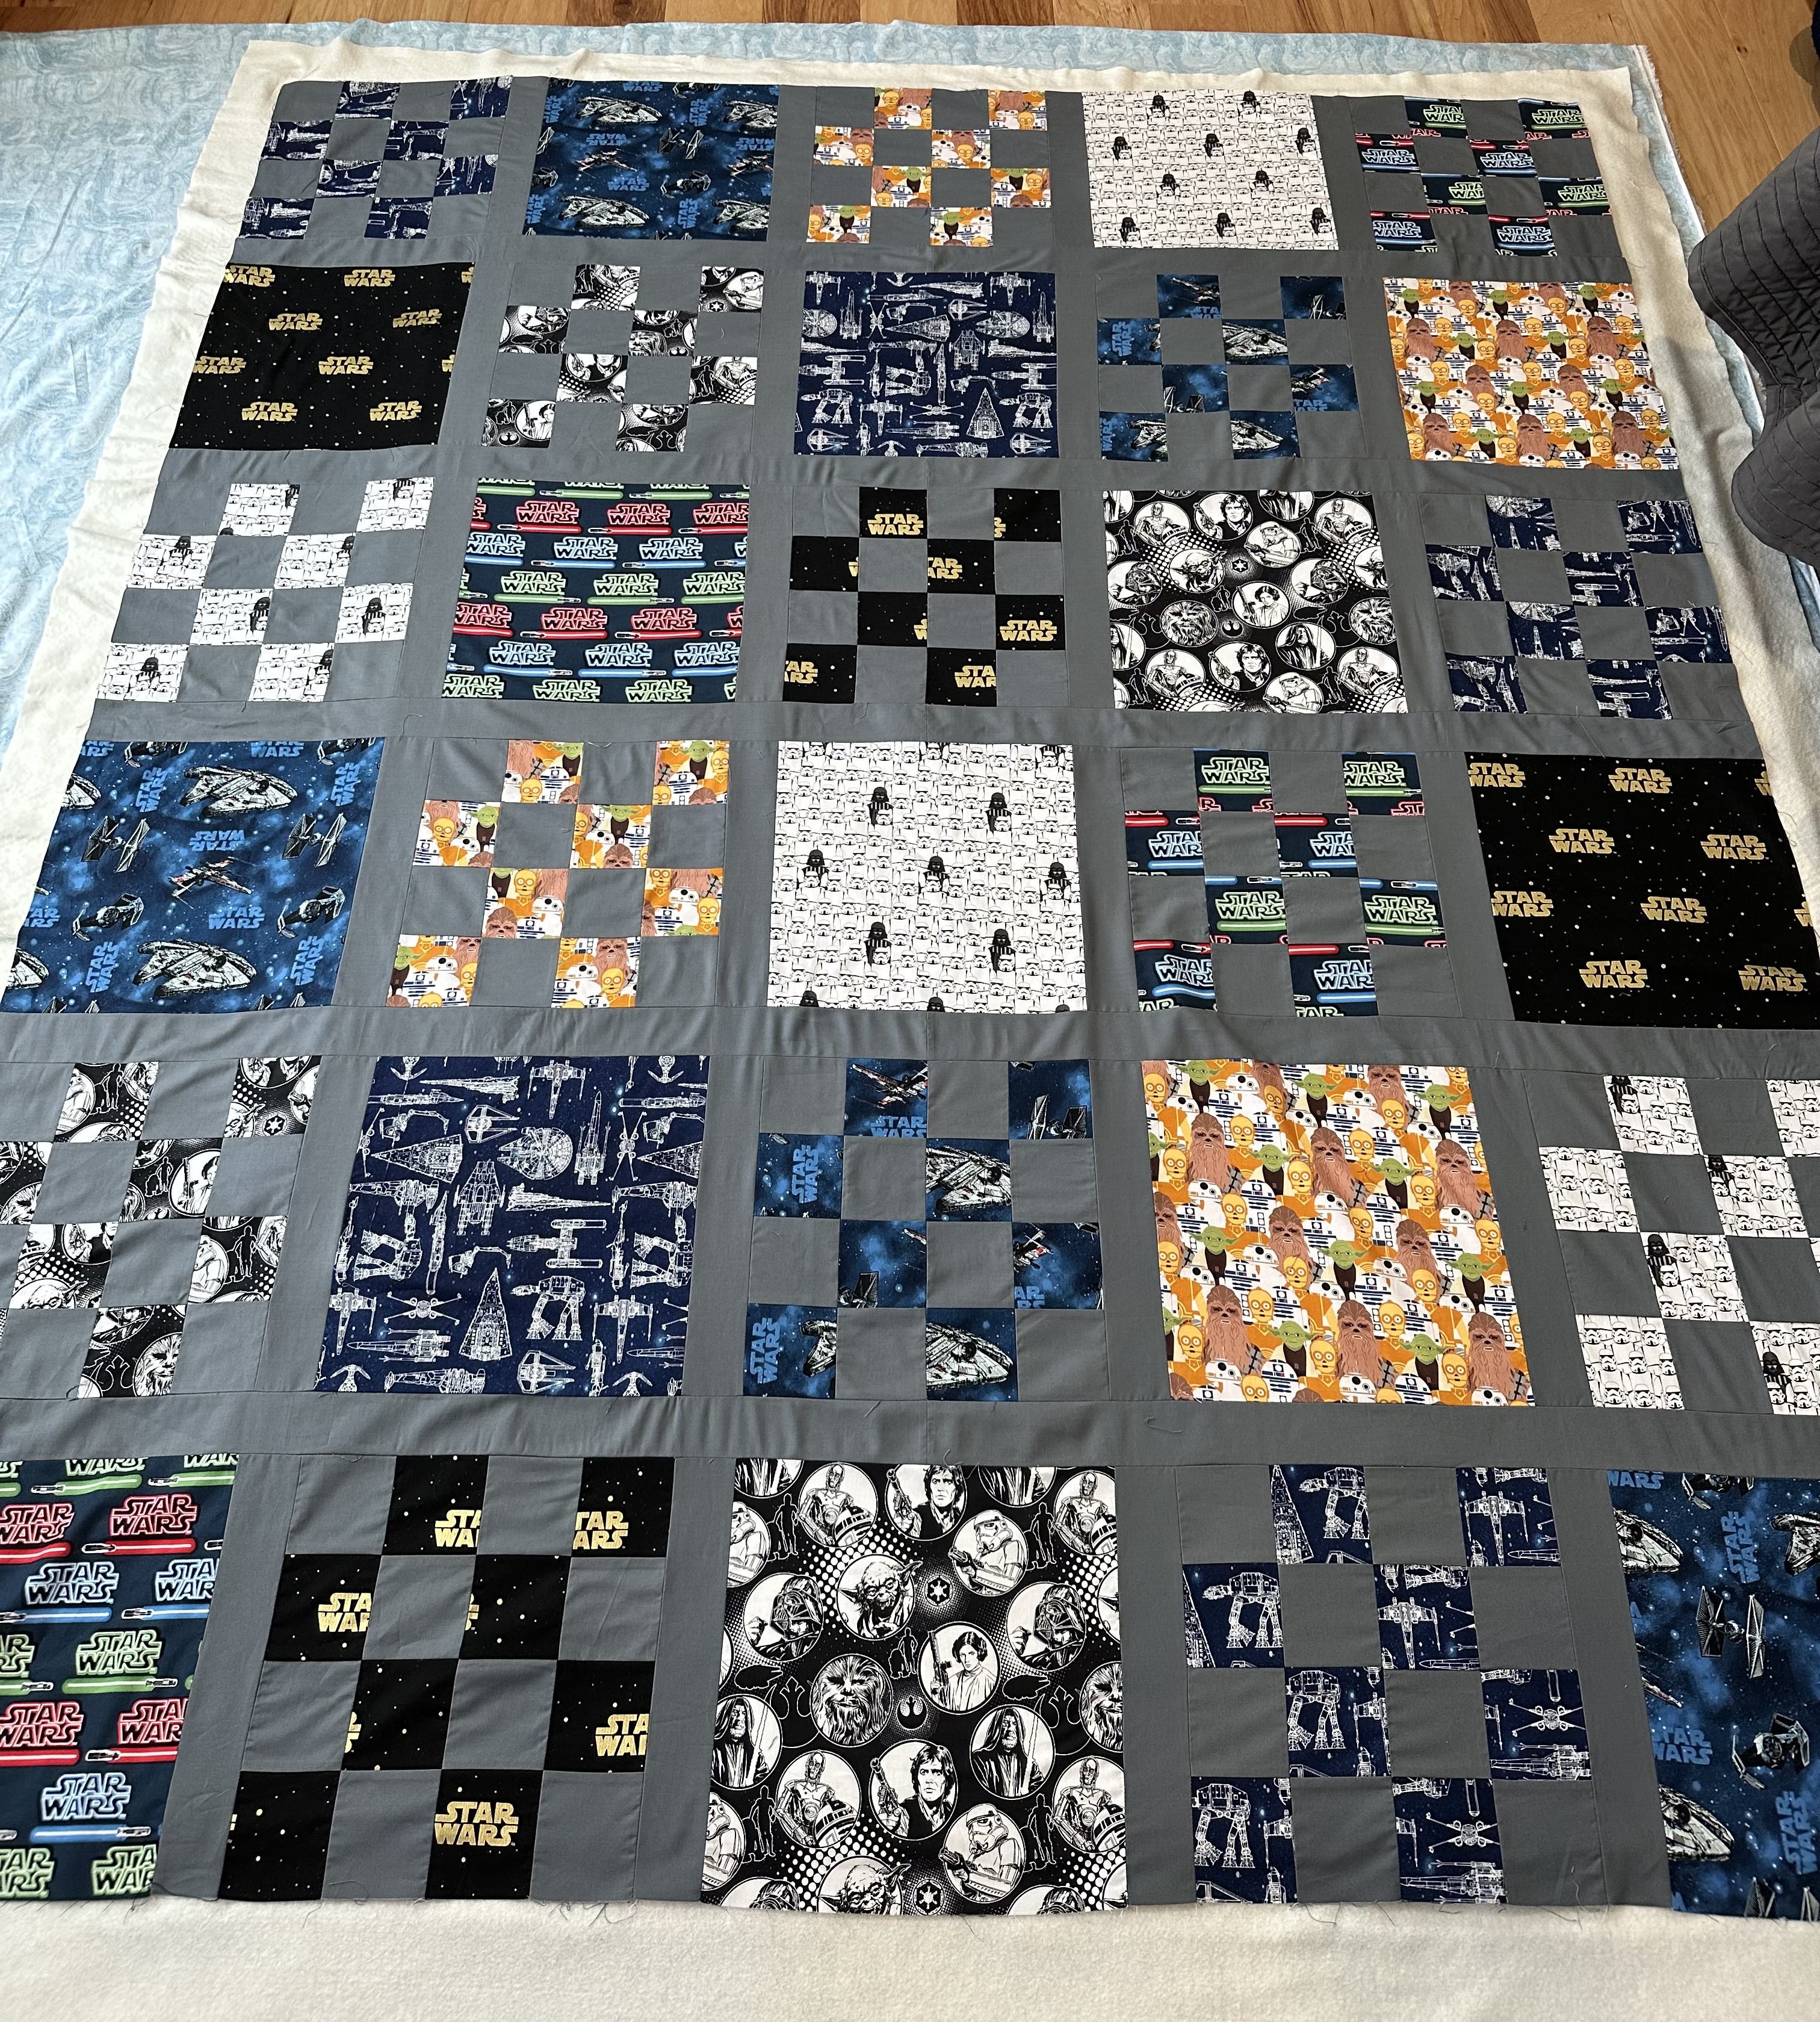
The quilt top came together pretty easily, however it was now a massive beast…. To quilt it together, first I did some horizontal and vertical lines between blocks so that it was stable, then decided to try to get a little more creative when it came to the blocks themselves using a mixture of techniques from the book WALK: Master Machine Quilting with Your Walking Foot by Jacquie Gering.
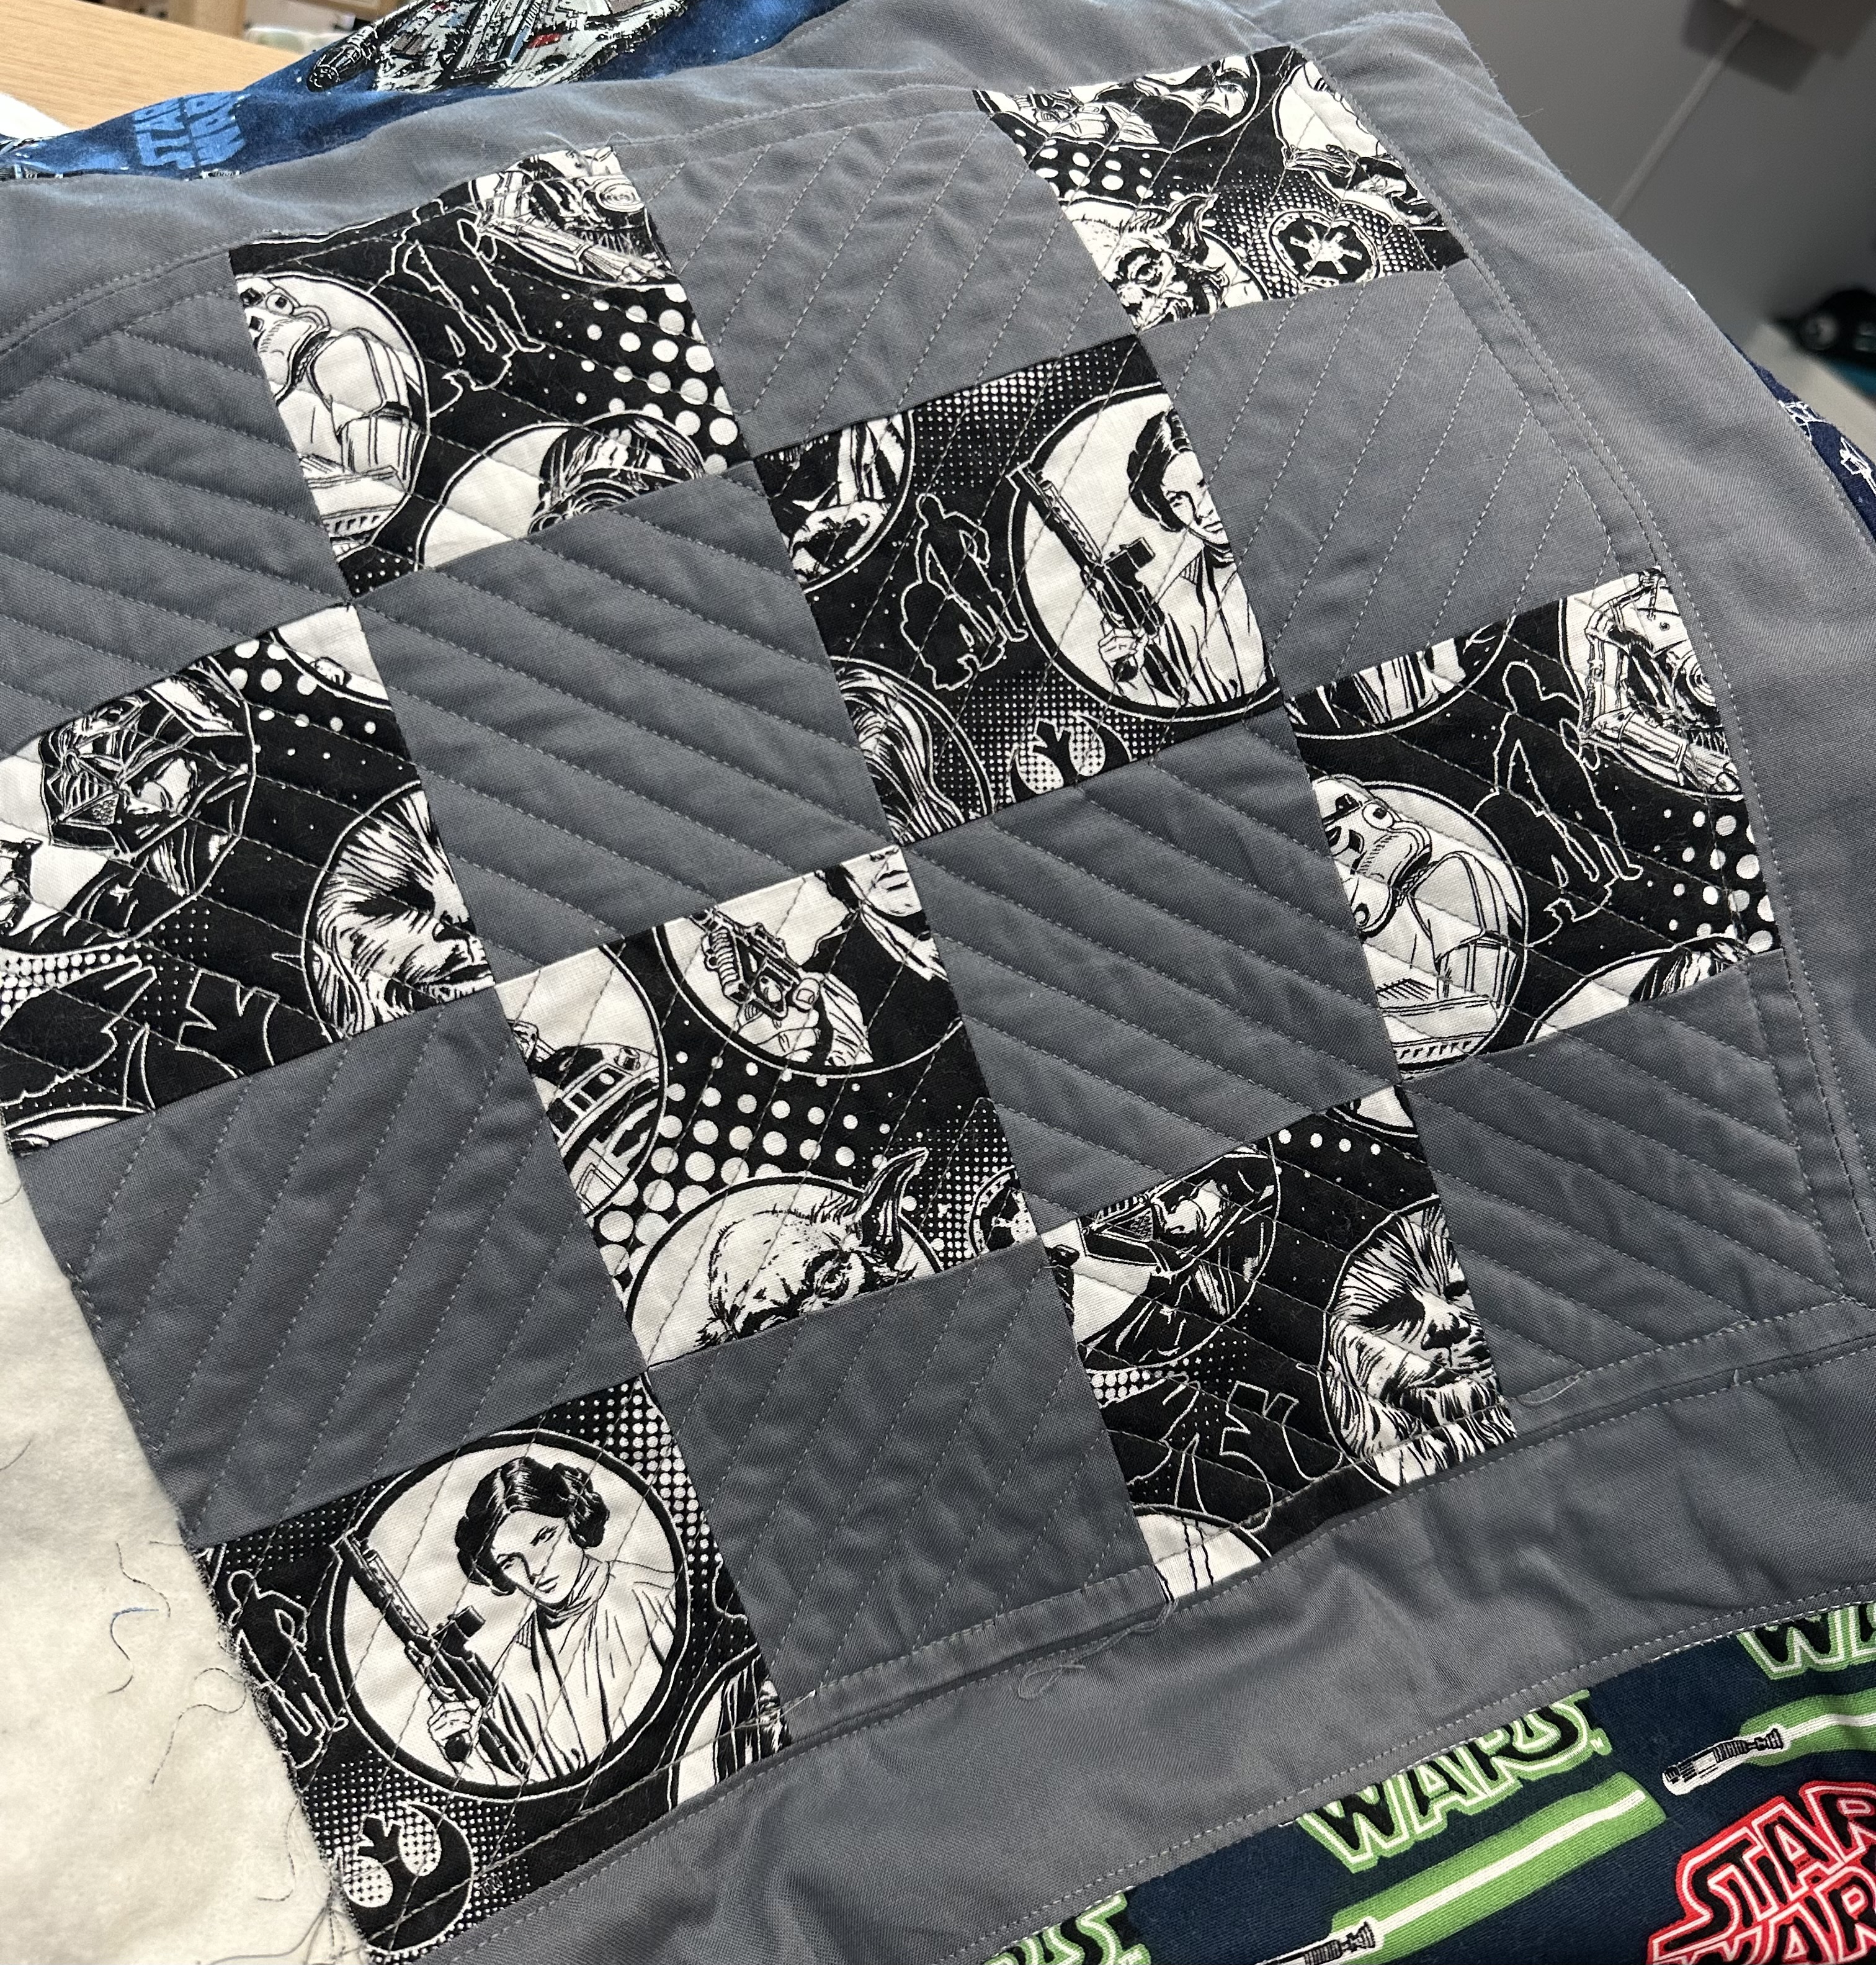
It looks great… but is quite time consuming, and tricky when doing it on a domestic machine as you have to manipulate large amounts of fabric through a small throat space!
Once quilted and trimmed, I had a quilt 65.5 x 77.5″. Perimeter of quilt was therefore 286″. I then decided to make life hard on myself again and try to do flanged binding as I thought it would be fun (!), I followed the instructions detailed here for how to construct the binding. The true binding was more of the grey fabric, the flange being a mixture of all the different fabrics. I cut a WOF 1.5″ strip of each of the patterned fabrics, and 7 WOF 1.25″ strips of the grey fabric.
….and it is done!