Our visitors have gone up to Sonoma for a couple of days, so it affords me the luxury of a bit of time to finish off some projects that had been languishing mostly complete. One was the cat tags, they just needed me to find where I had hidden the collars, attach them, and then wrangle the cats for a picture. Tricky. This was also mostly complete, just required finishing off into a completed object!
So, just before Christmas we popped into Crate and Barrel because I had seen some bedding that I thought Mr M would actually like, AND it was now on sale.
We came home with it clearly (the last set in the store and they gave us a $25 gift card as they were having a promotion! Suhweet!) It was the Stitch bedding.
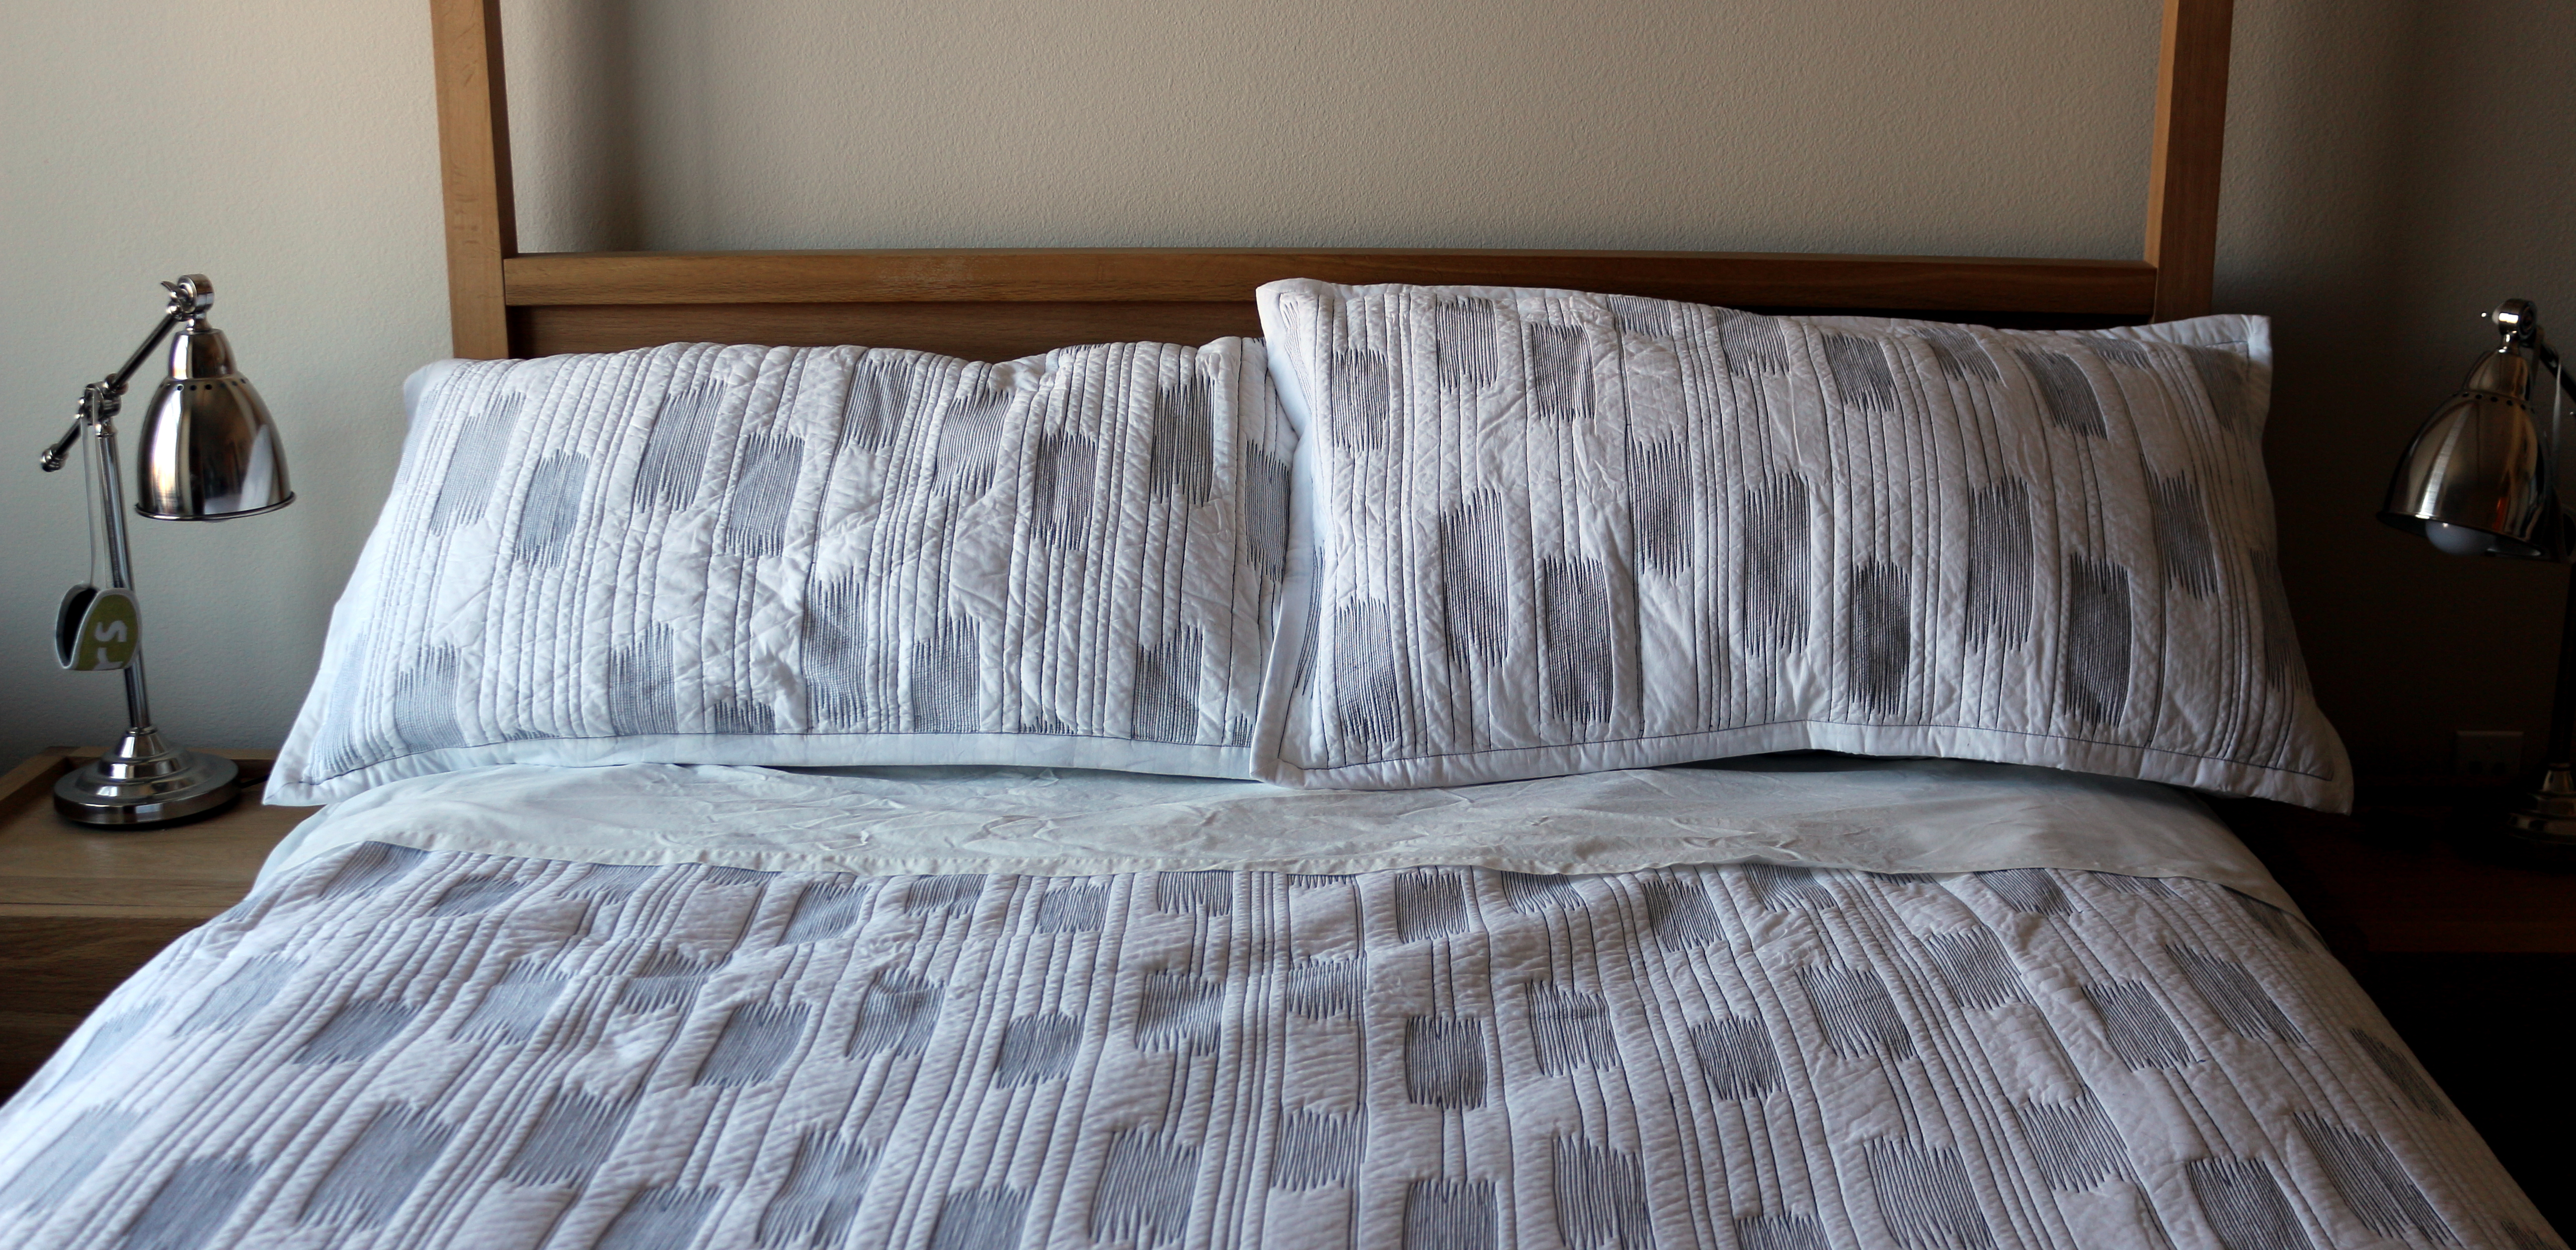
Cute yes? White with dark blue stitched lines and zigzags. Mr M is very anti-flowers.
But I couldn’t deny it was looking like it was missing something. We did have some cushions from Habitat that we bought to go with our old bedding, but they are sort of a khaki green with pale green stripe. Just didn’t work with the new stuff.
Anyhow, while we were at Crate and Barrel after Christmas, (spending our free gift card – we do shop other places honest) I saw this cushion:
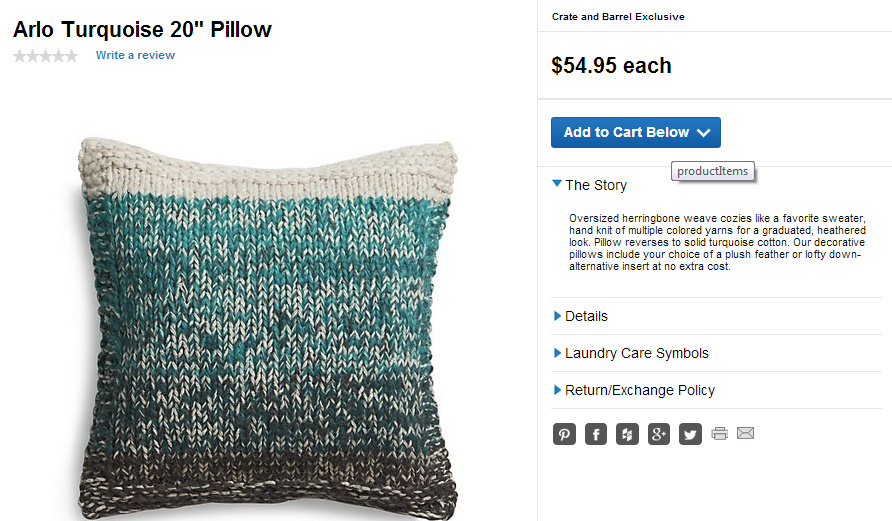
I liked it, it was warm and soft and snuggly, but it also didn’t go, and really? $55? Even having a free $25 gift card didn’t make me want to pay that for something that didn’t really go anyway! So, using the C&B cushion as inspiration, I figured how hard could it be to make one?
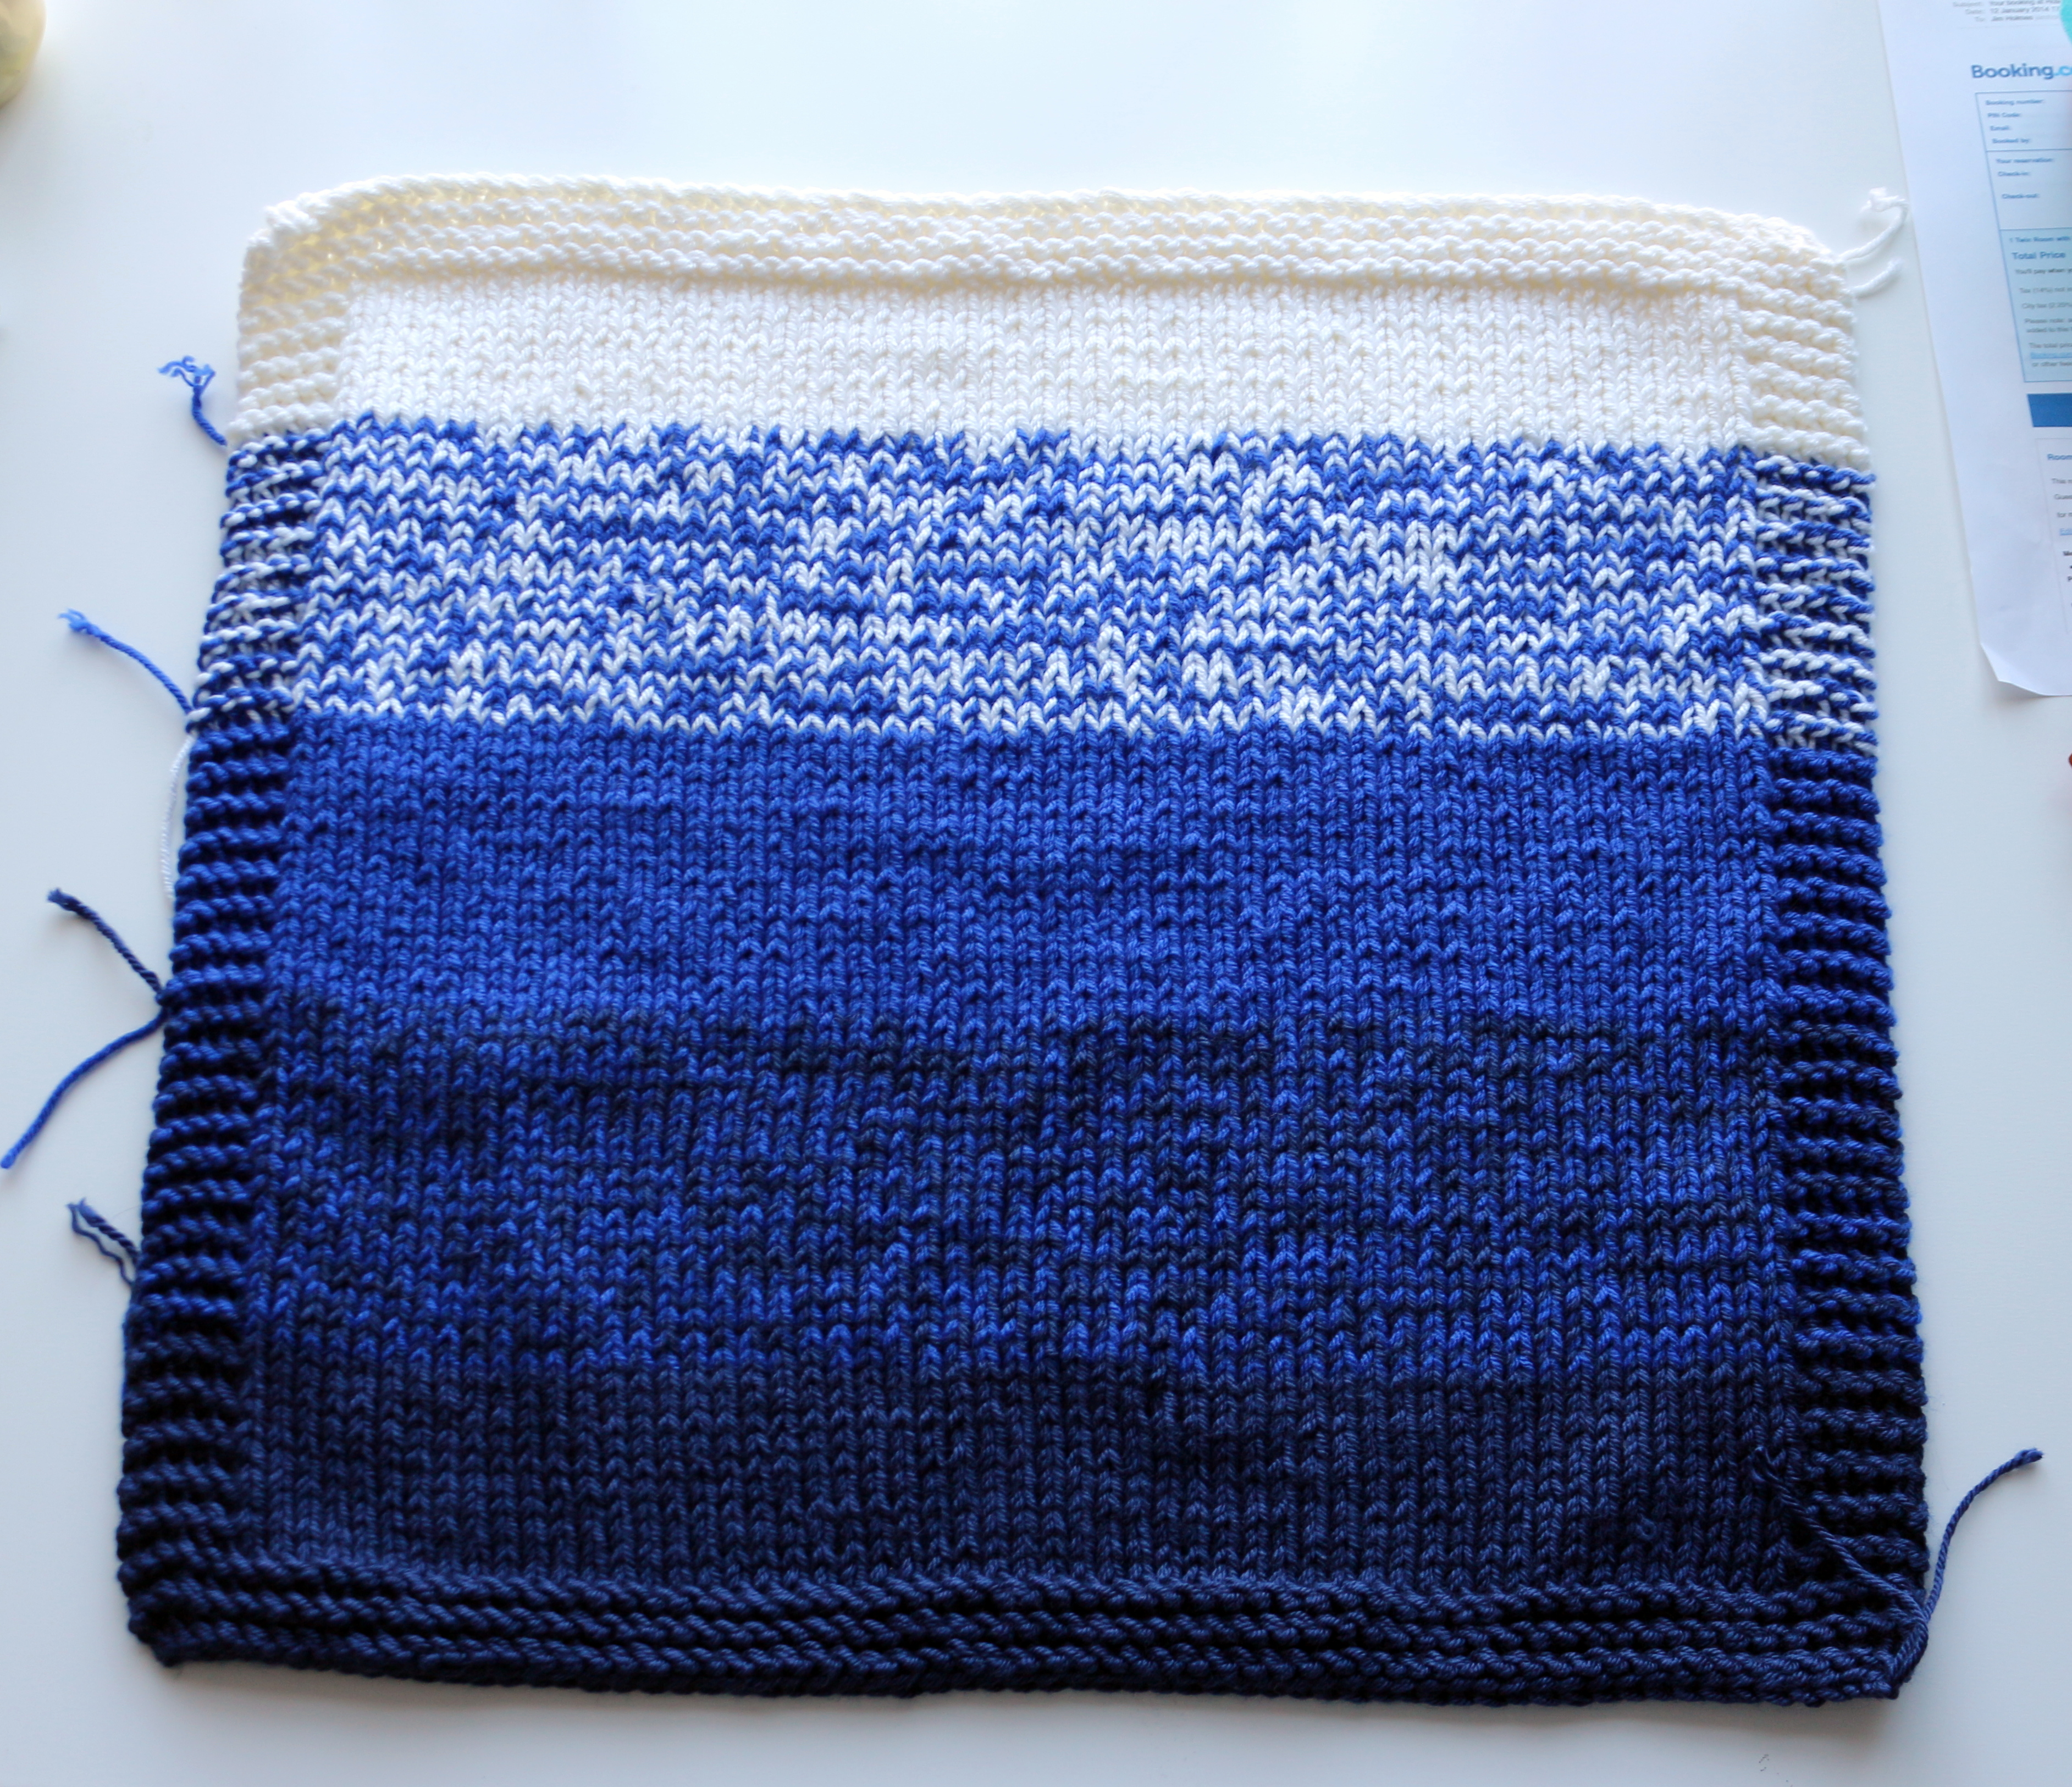
I examined my stash and found some royal blue and white worsted weight wool, and then bought some navy worsted too:

For information, the white and royal blue are Deborah Norville Everyday Soft Worsted in Snow White and Royal Blue, and the Navy is Red Heart Soft Worsted in Navy.
Then I did some calculations based on knitting using a size 13/9mm needle and double strands, and a tension of 10sts over 10 rows garter stitch measuring 3 by 2 1/2 inches, and the dimensions of my existing cushion. The cushion was worked so that the cushion part is where the stocking stitch central part is, and a garter stitch outer flange.
Pattern:
Using two strands of white, cast on 64 sts and work 6 rows in garter stitch.
7th row: k64
8th row: k5 p54 k5
9-16th rows: rpt 7 and 8, 4 times more
17th row: change one of the strands of yarn to royal blue, so that you are working with one strand white and one strand blue, k64
18th row: k5 p54 k5
19-34th rows: rpt rows 7 and 8, 8 times
35th row: change the white strand to royal blue, so that the working yarns are both royal blue, k64
36th row: k5 p54 k5
37-50th rows: rpt rows 7 and 8, 7 times
51st row: change one of the strands to navy, so that you are working with one strand navy and one strand blue, k64
52nd row: k5 p54 k5
53rd-68th rows: rpt rows 7 and 8, 8 times
69th row: change the blue strand to navy, so that the working yarns are both navy, k64
70th row: k5 p54 k5
71st-78th rows: rpt rows 7 and 8, 5 times
79-84th rows: work 6 rows garter stitch
Bind off knitwise, then you should have something that looks a little like this:
Weave in all your ends, then I ummed and ahhed a bit over the best way to do this next bit, I did try just sewing the knit piece straight on to some cotton, I wanted a fabric backing in order for it to maintain some structure to it, but the stitches were really visible. In the end, I made the base cover out of some regular cotton twill, with a buttoned closure at the back, then handstitched the knitted piece to the top, around the edges. (I may also add some stitches in the centre in order to keep it nicely in place, but haven’t decided yet.)
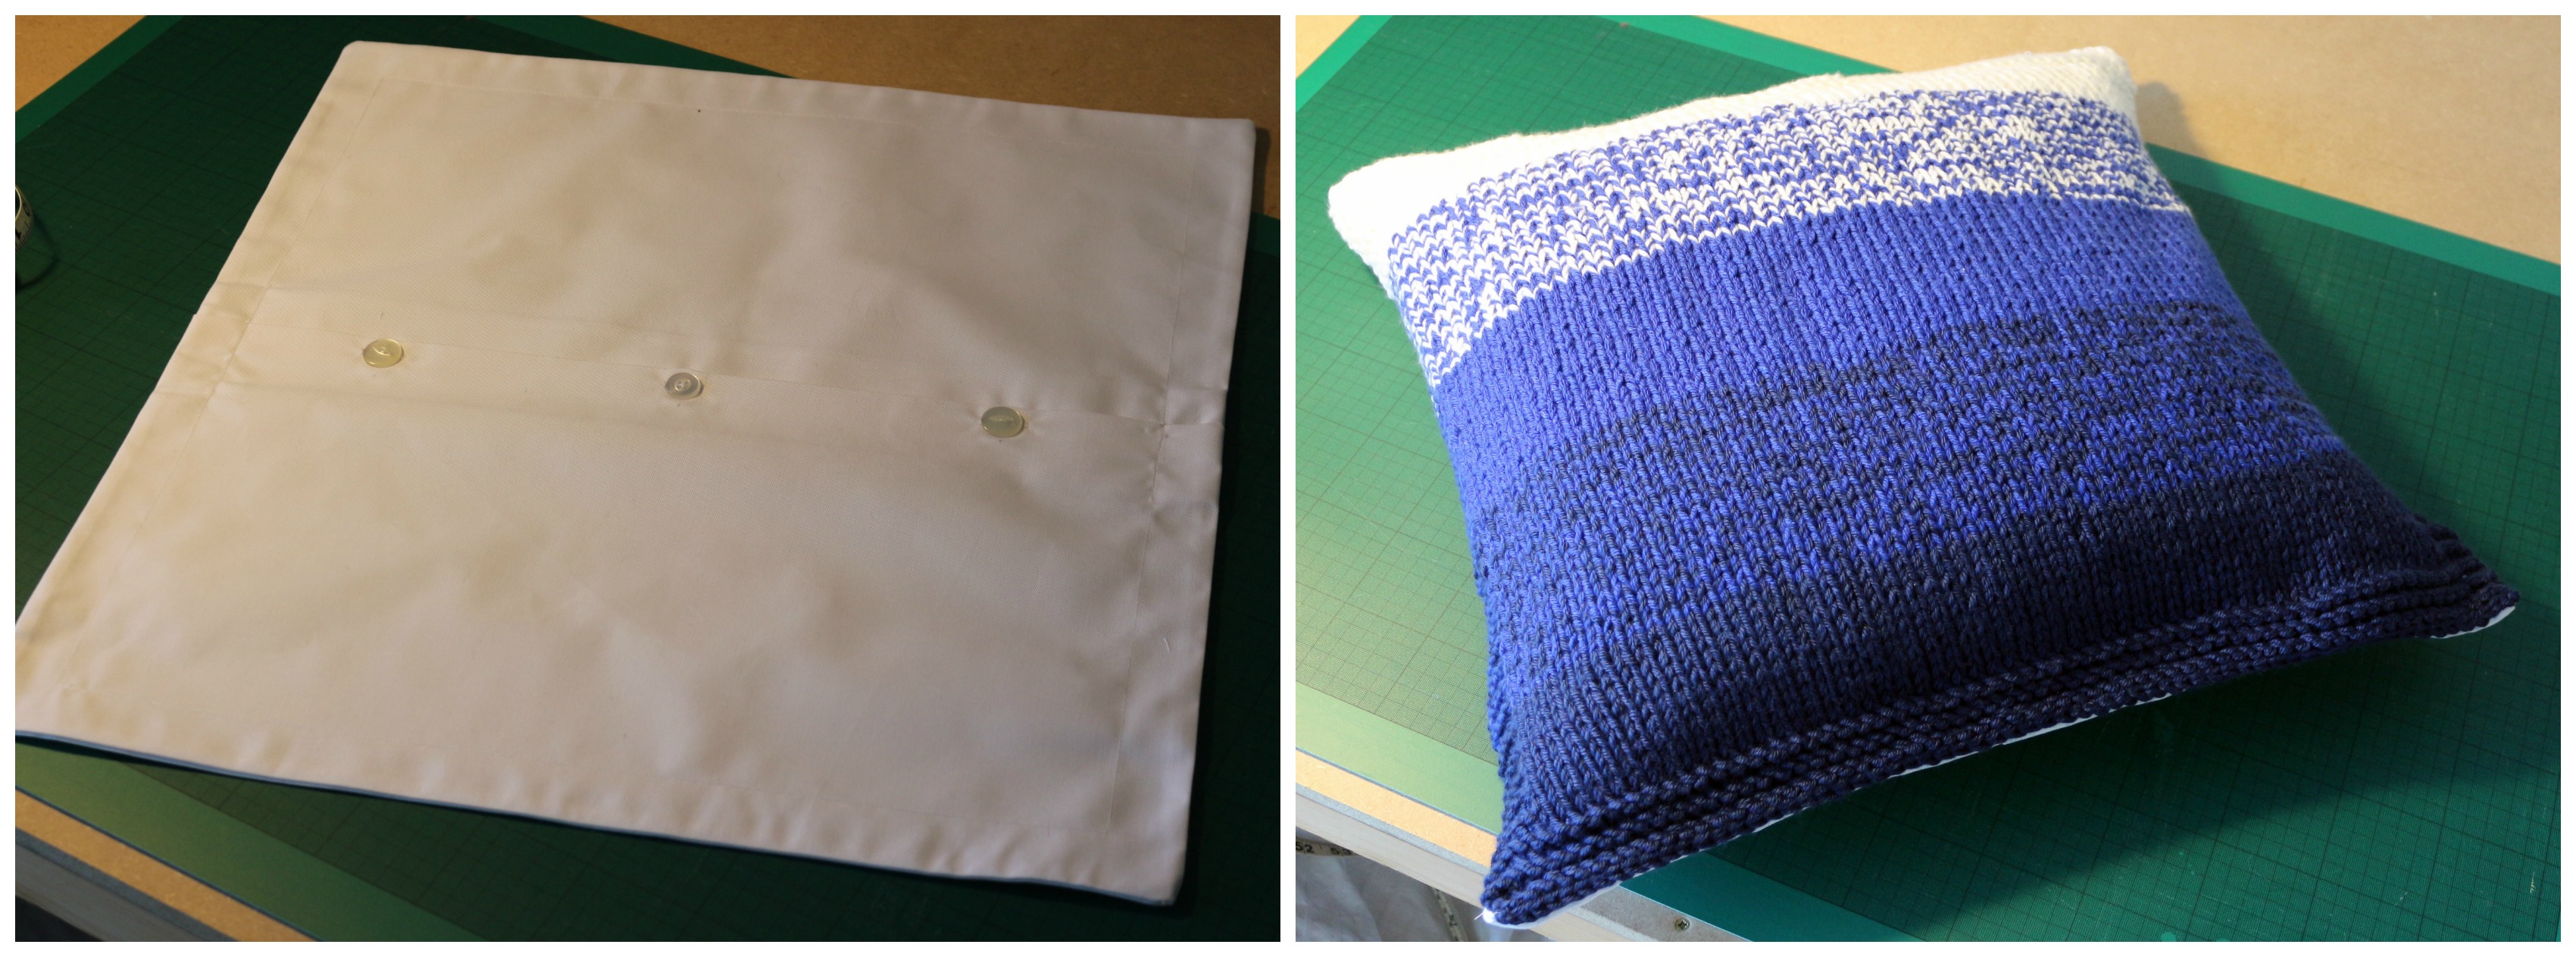
Done!
Again, for information, the cushion inner was 18 by 17 1/2 “, the top piece of cotton was 21 1/2″ by 21″ (including 1/2″ seams), the back pieces were each 21 1/12 by 13 1/”. I overlocked one of the long edges of each piece for the back, then folded over 2″, pressed, then added the buttonholes to one of them, and buttons to the other. I sewed the front to back, right sides together, using 1/2 seams, then overlocked them to stop them fraying. then I sewed the flange, 1 1/2″ in from each side.
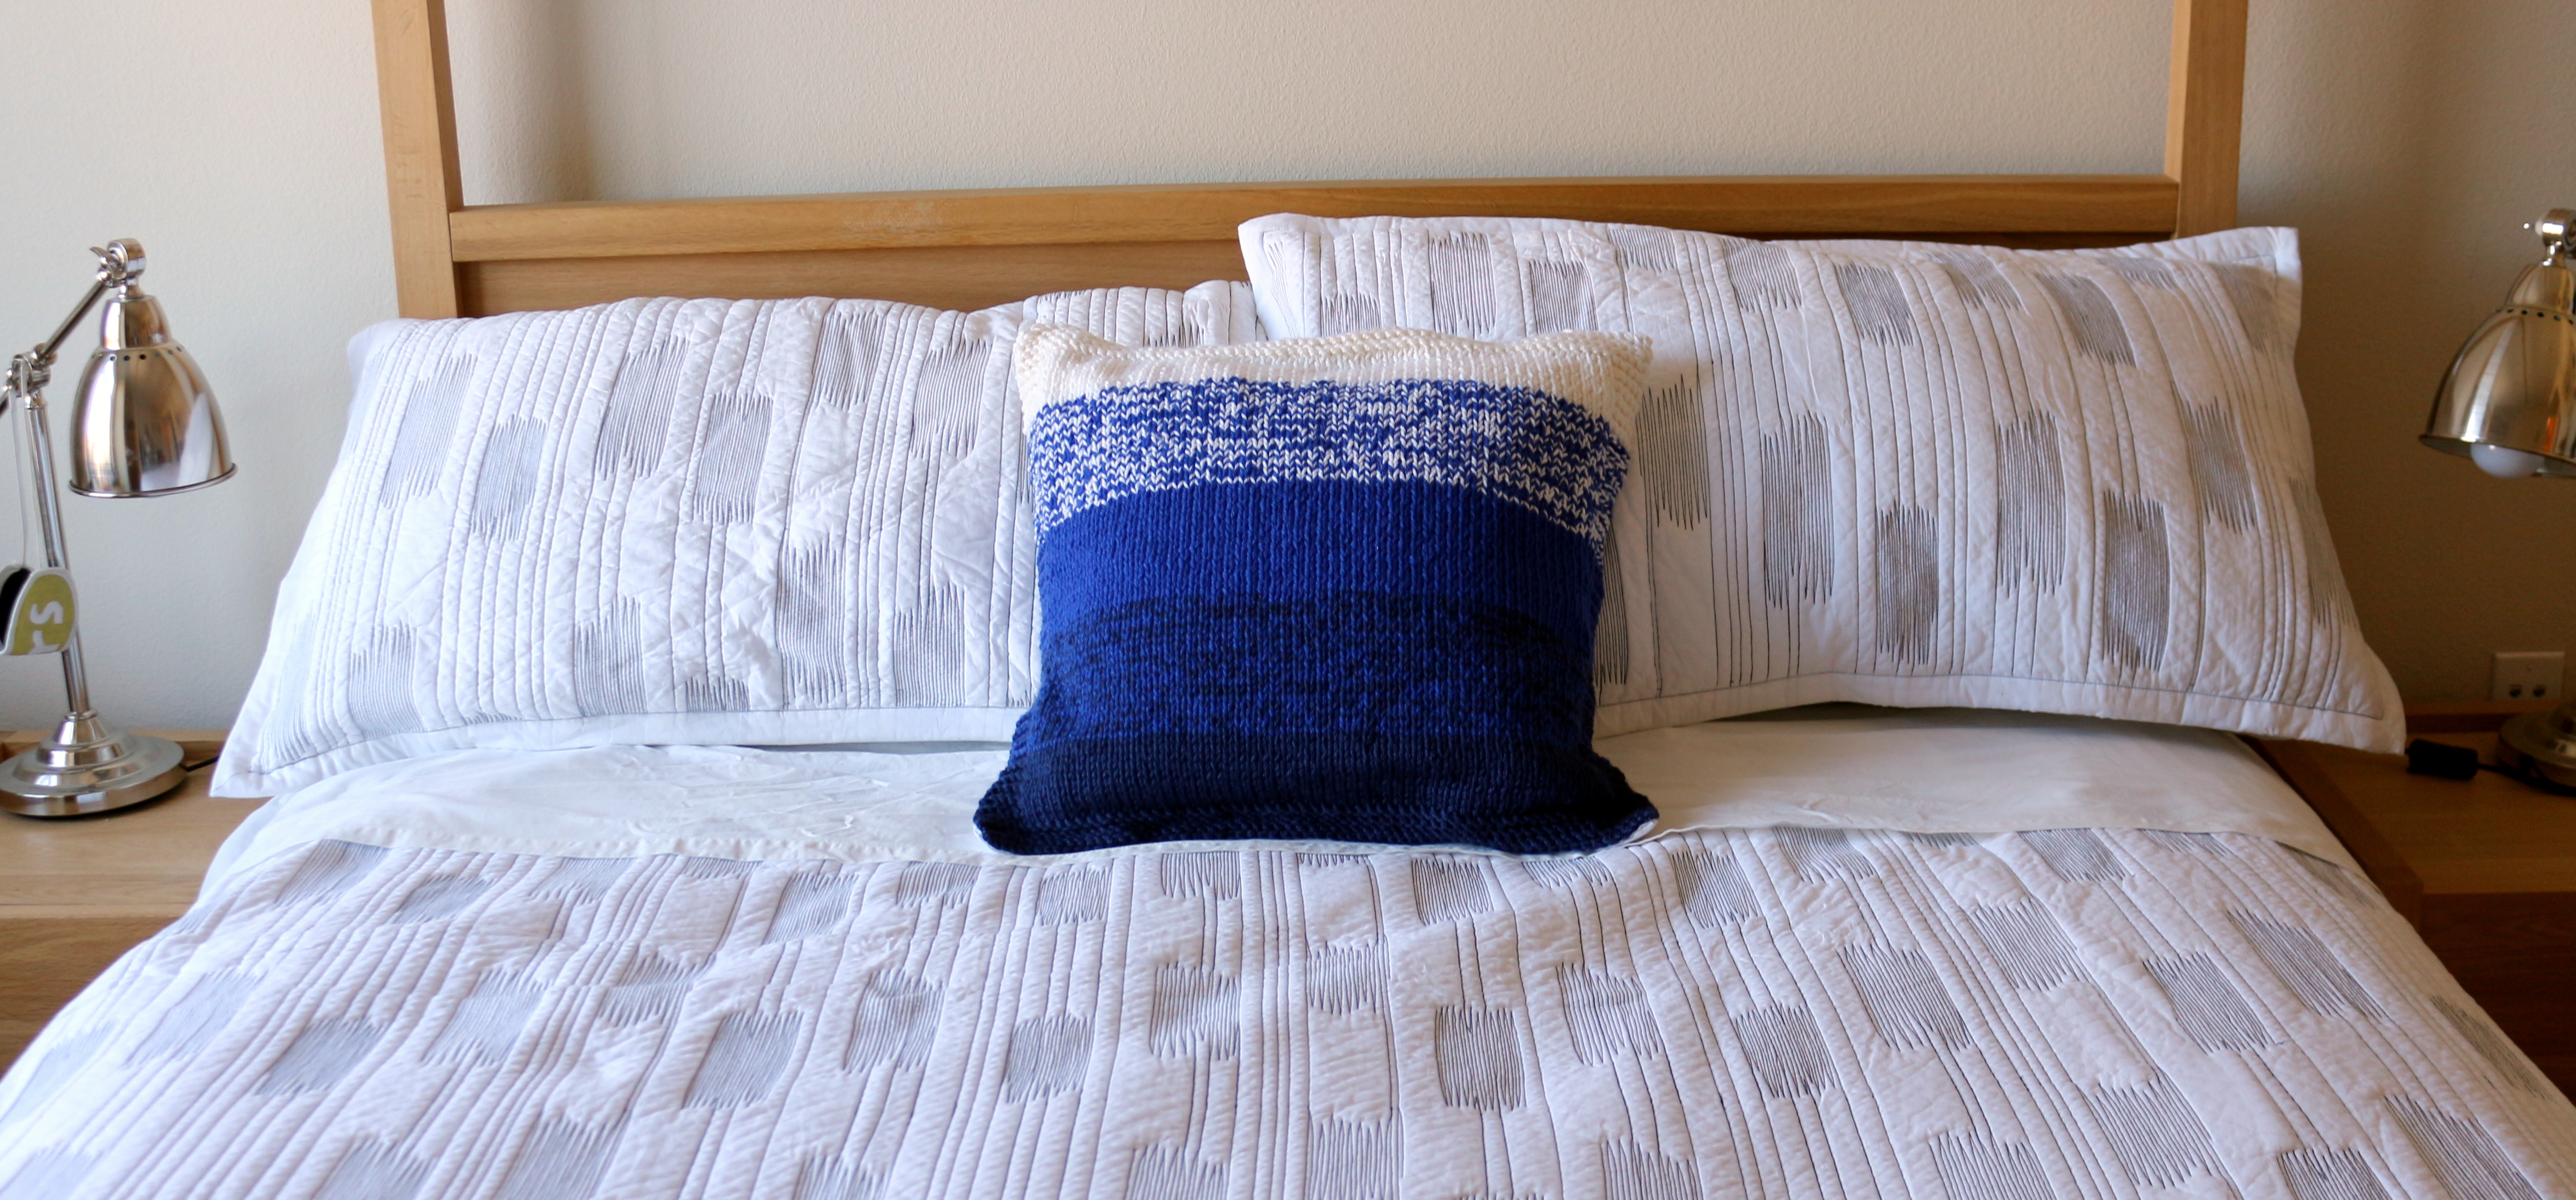
Not bad! I don’t have enough wool to make a matching second cushion, so it will have to remain as just the one, but I think it looks just grand the way it is!

