Nesting!
We put together the furniture for the baby’s room last week (although she will probably sleep in our room for at least the first few months), just a fairly basic crib and changing table from IKEA, along with re-utilising some existing drawers that we have had for a while.
To go with the changing table, we got a couple of VÄDRA changing mats, one for the table, and one extra that we can keep downstairs.

Practical, but very…. blah. The surface is wipe-clean plastic – practical, but probably not so nice for baby’s bottom. They sell covers at IKEA, but they were a) out of stock, and b) ugly, so I decided to make a few covers so we had some backups for in case of….. incidents. First I took a few measurements:
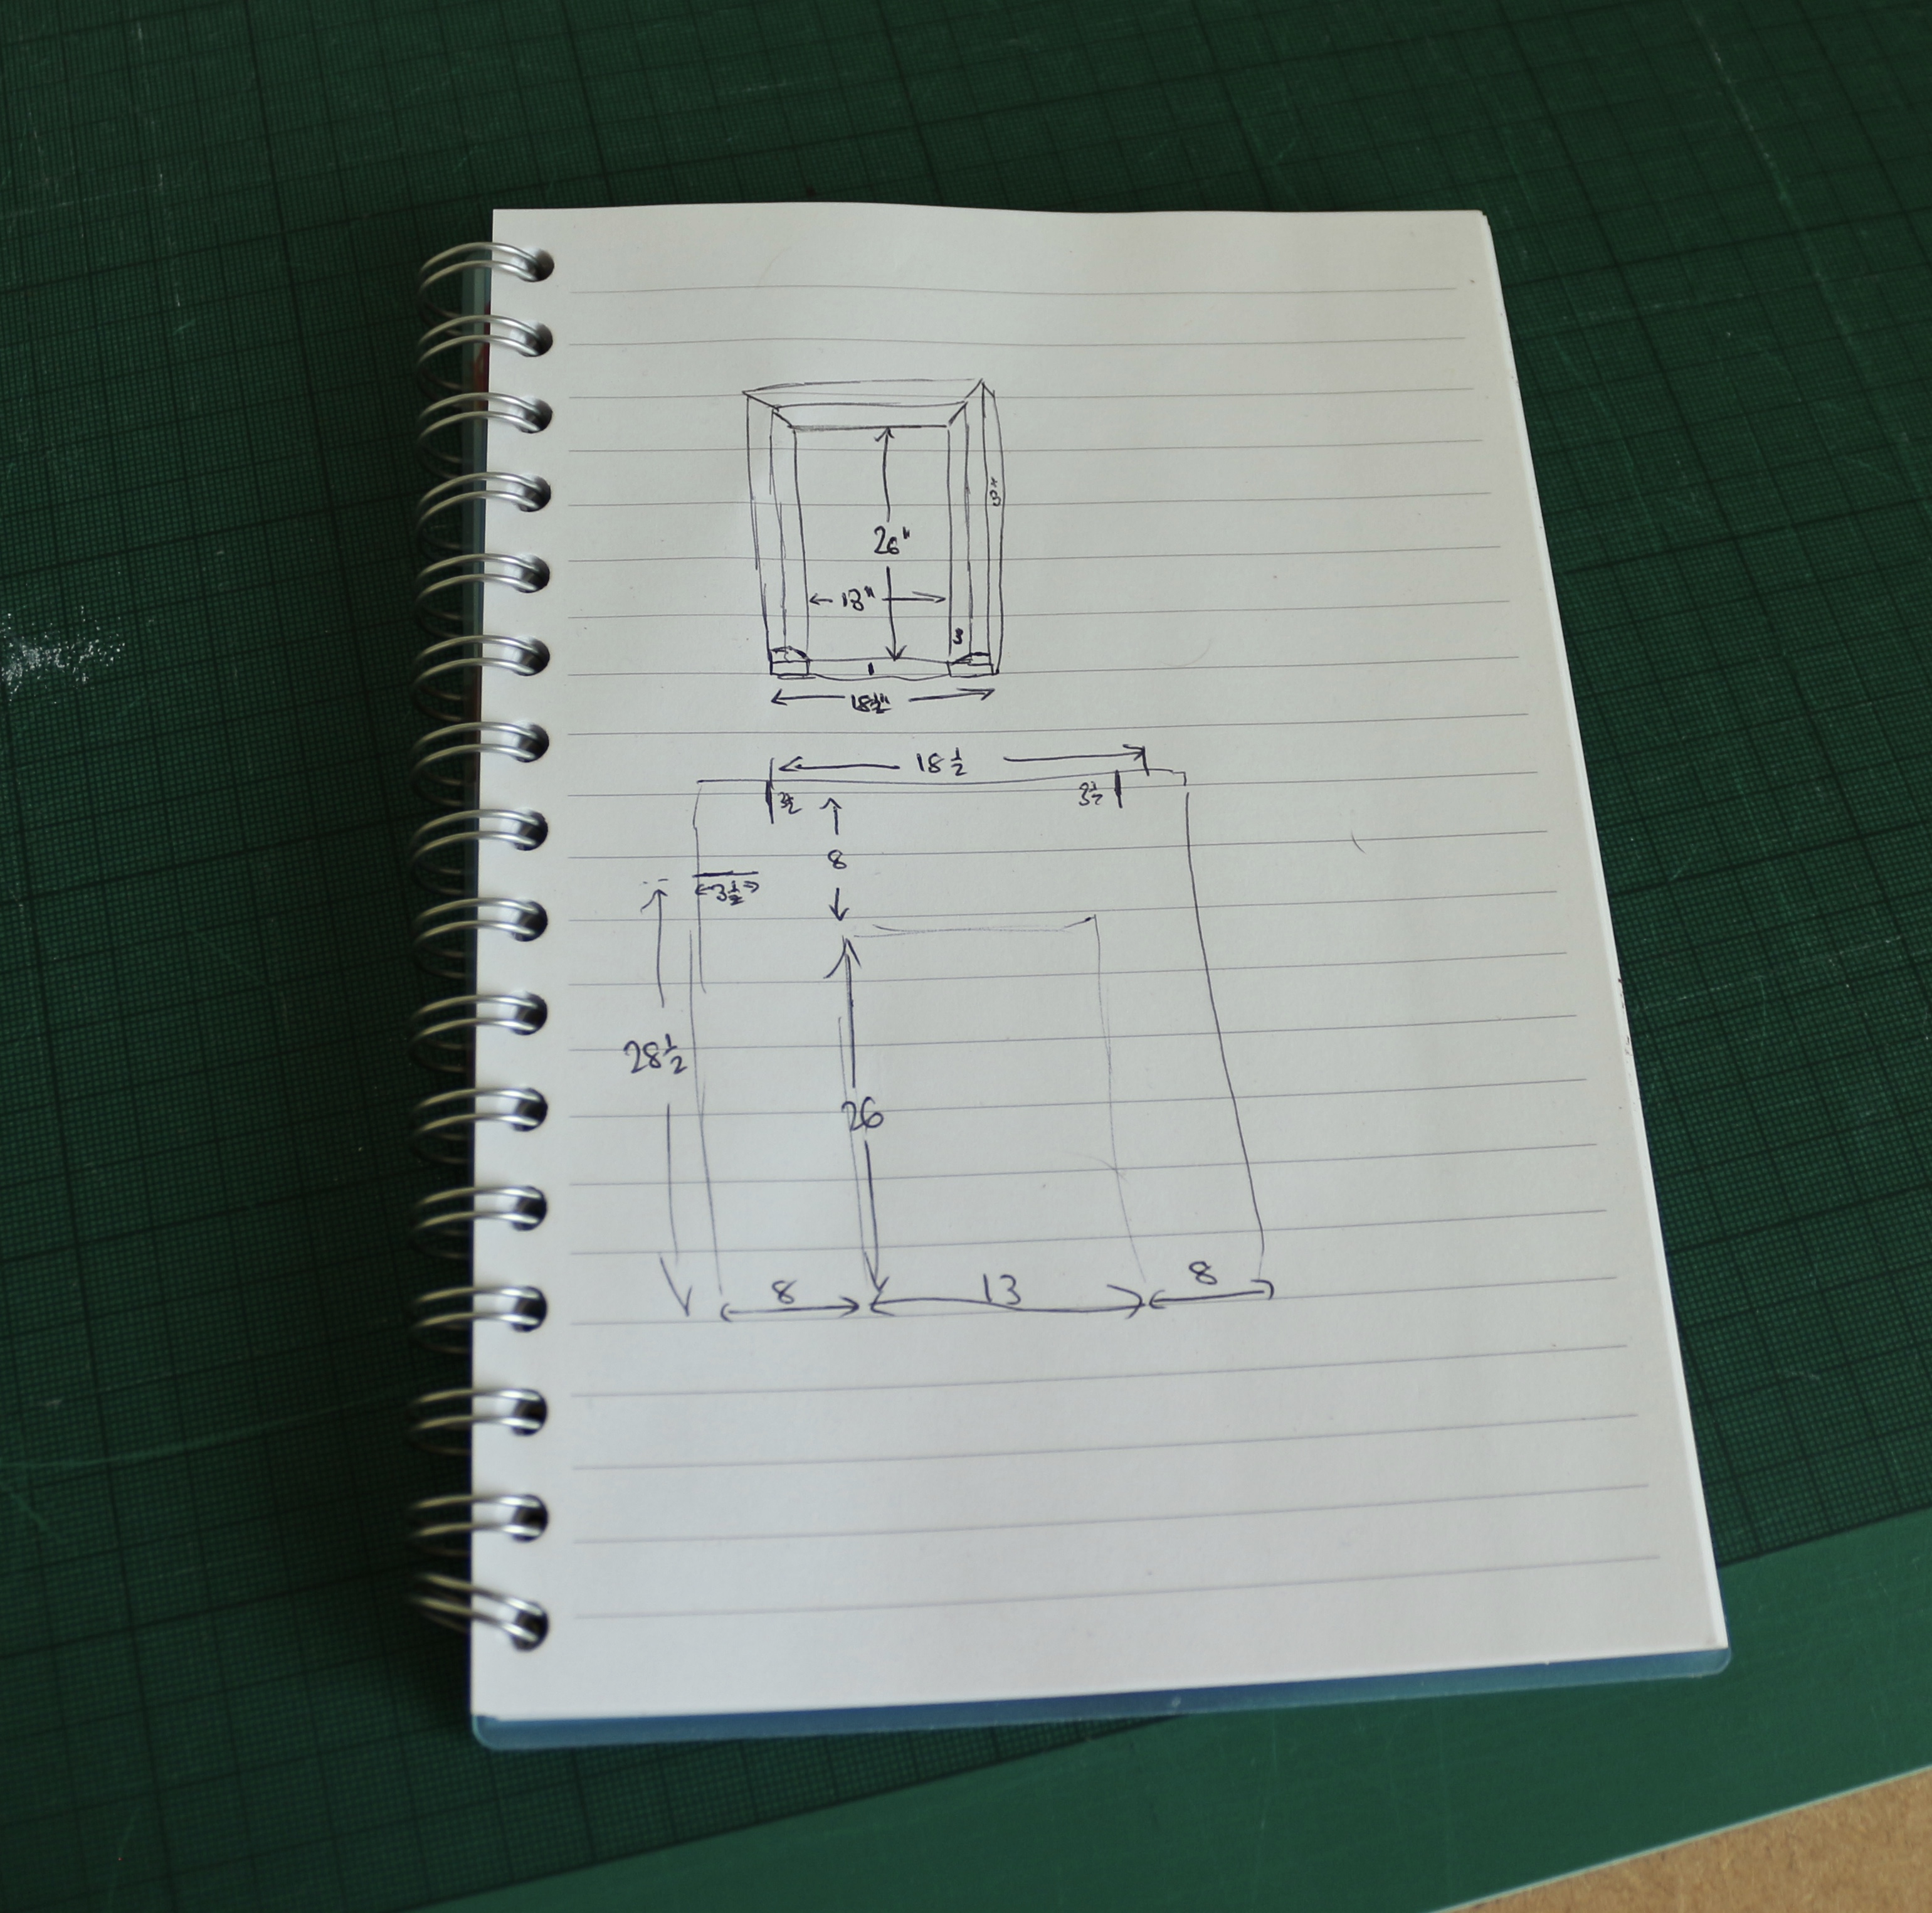
..and created a template from that, which looked a little like this:
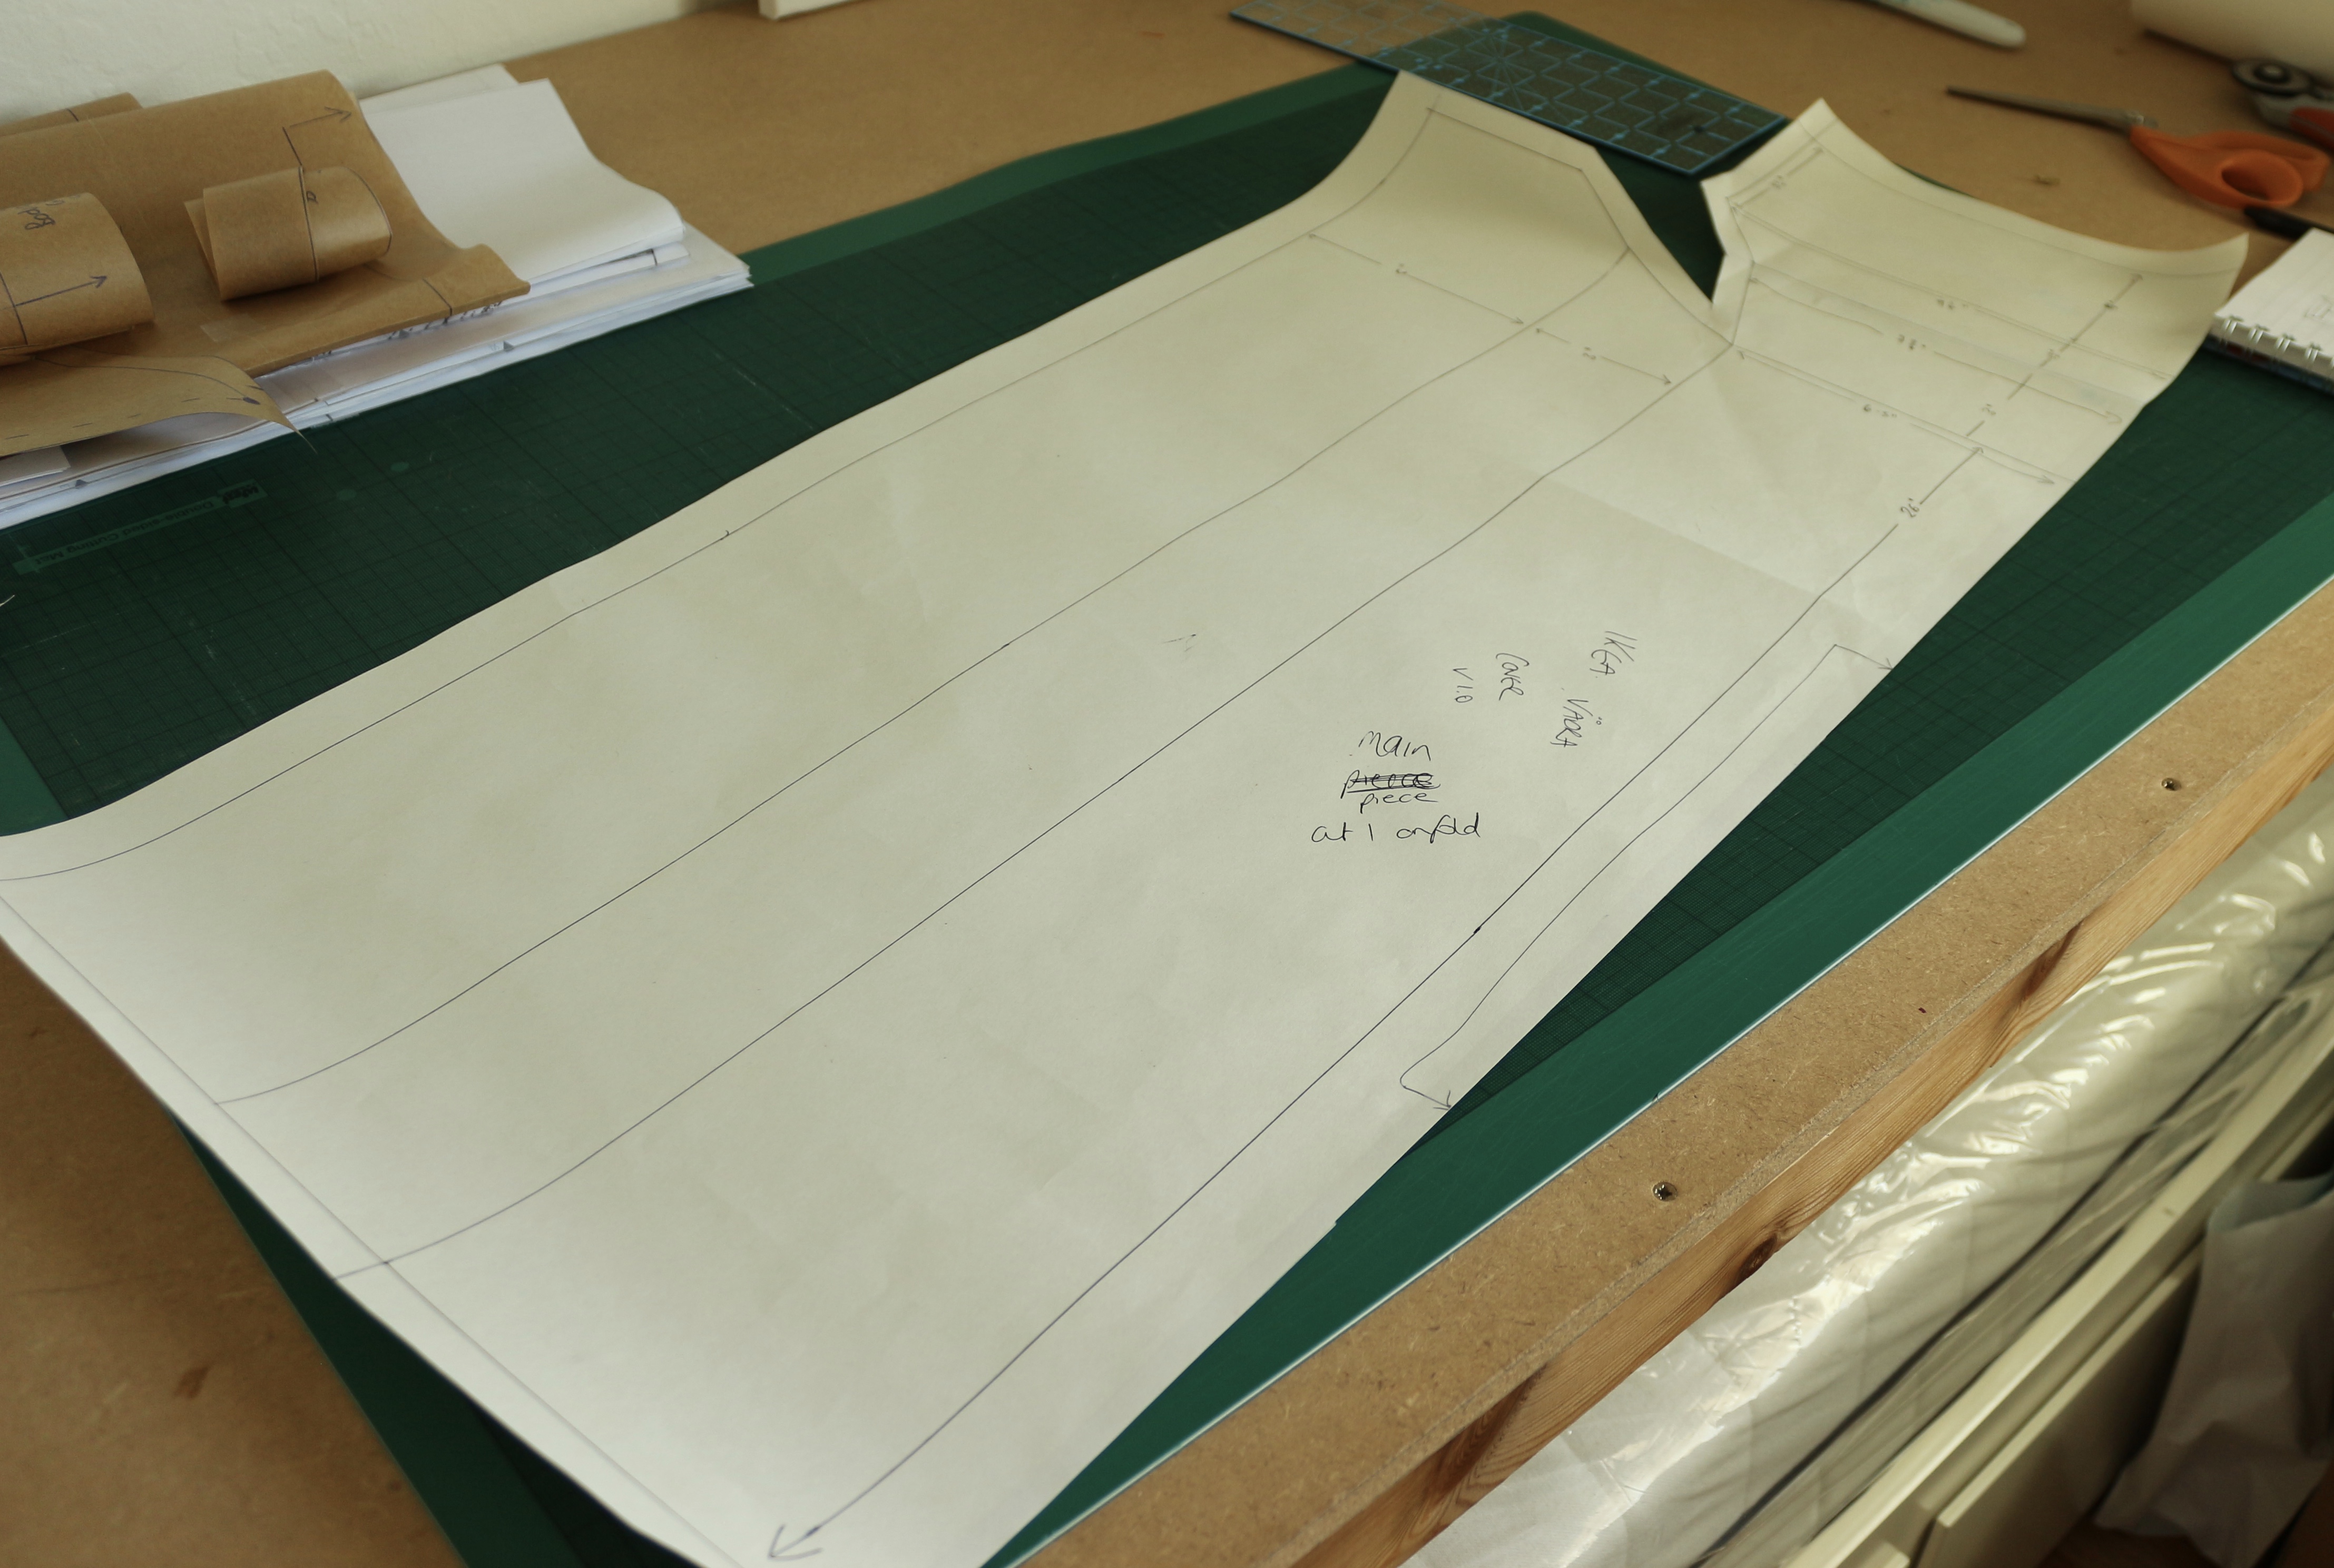
The main piece covers the majority of the mat, with some shaping for the raised end of the mat. Close up (plus measurements), it looked a little like this (to cut on the fold):
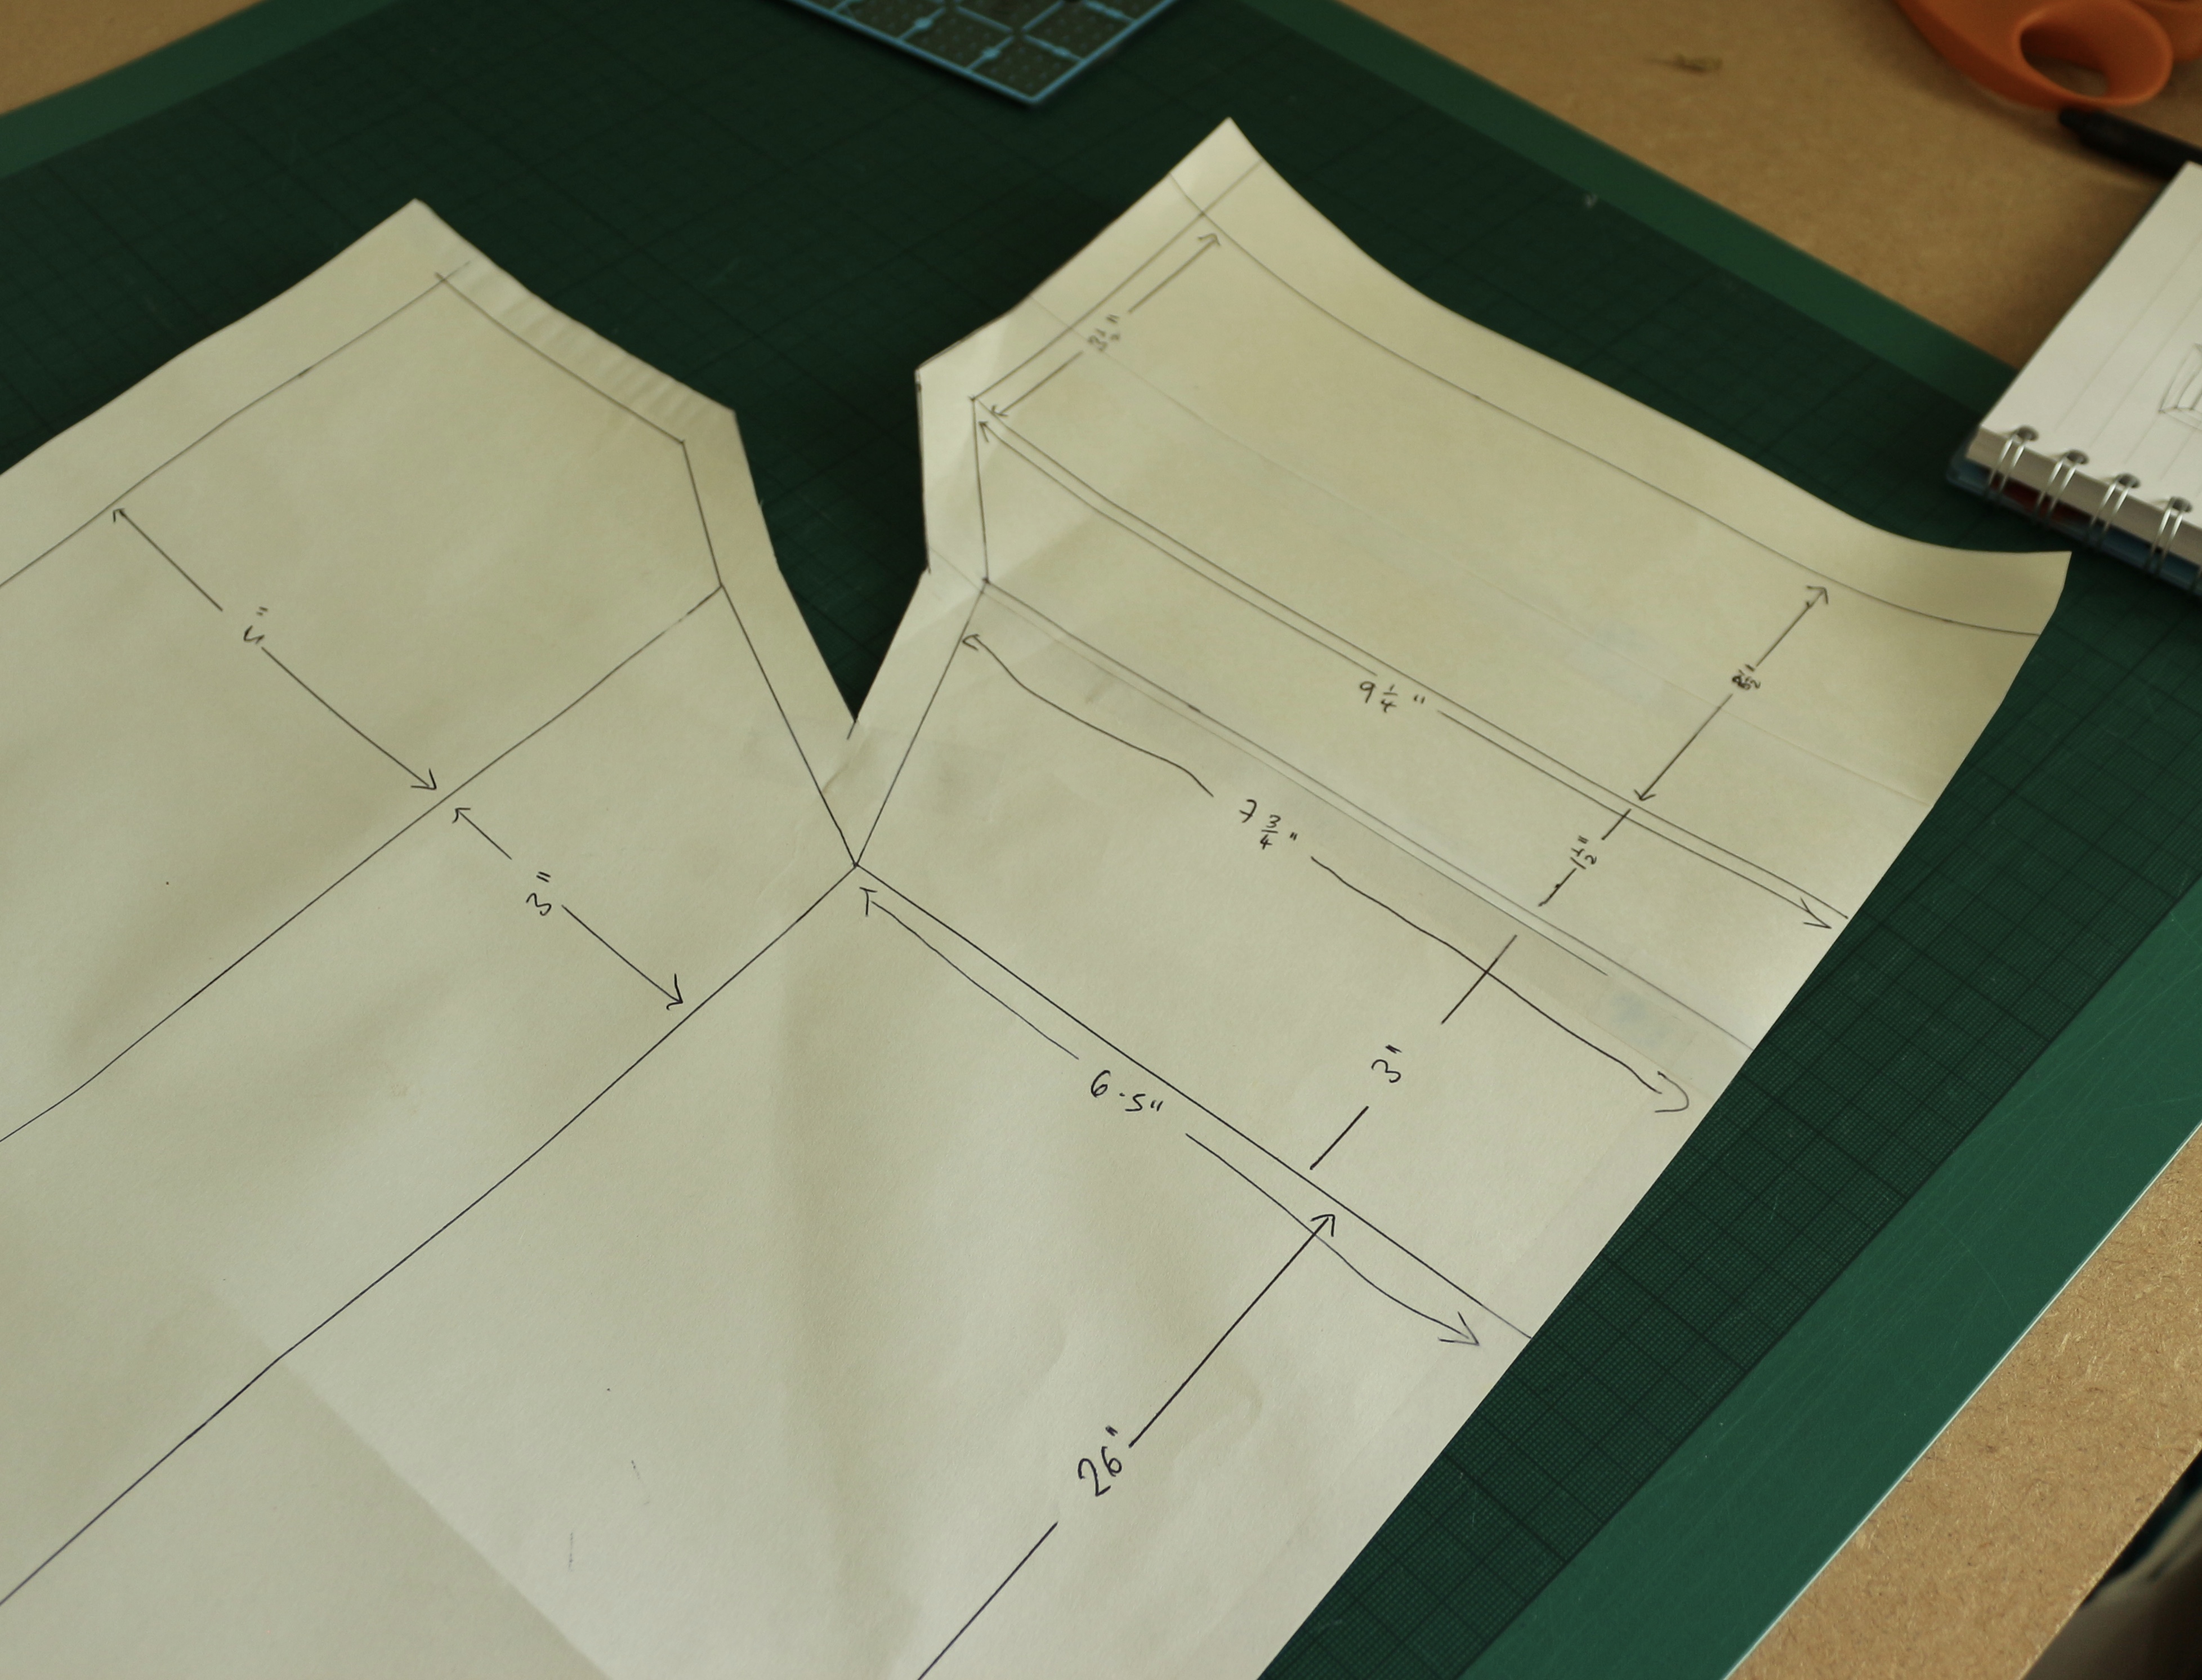
At the other end, it is not raised, but requires a bit of shaping to accommodate the raised sides, so I cut a separate piece that was sewed to the flat edge:
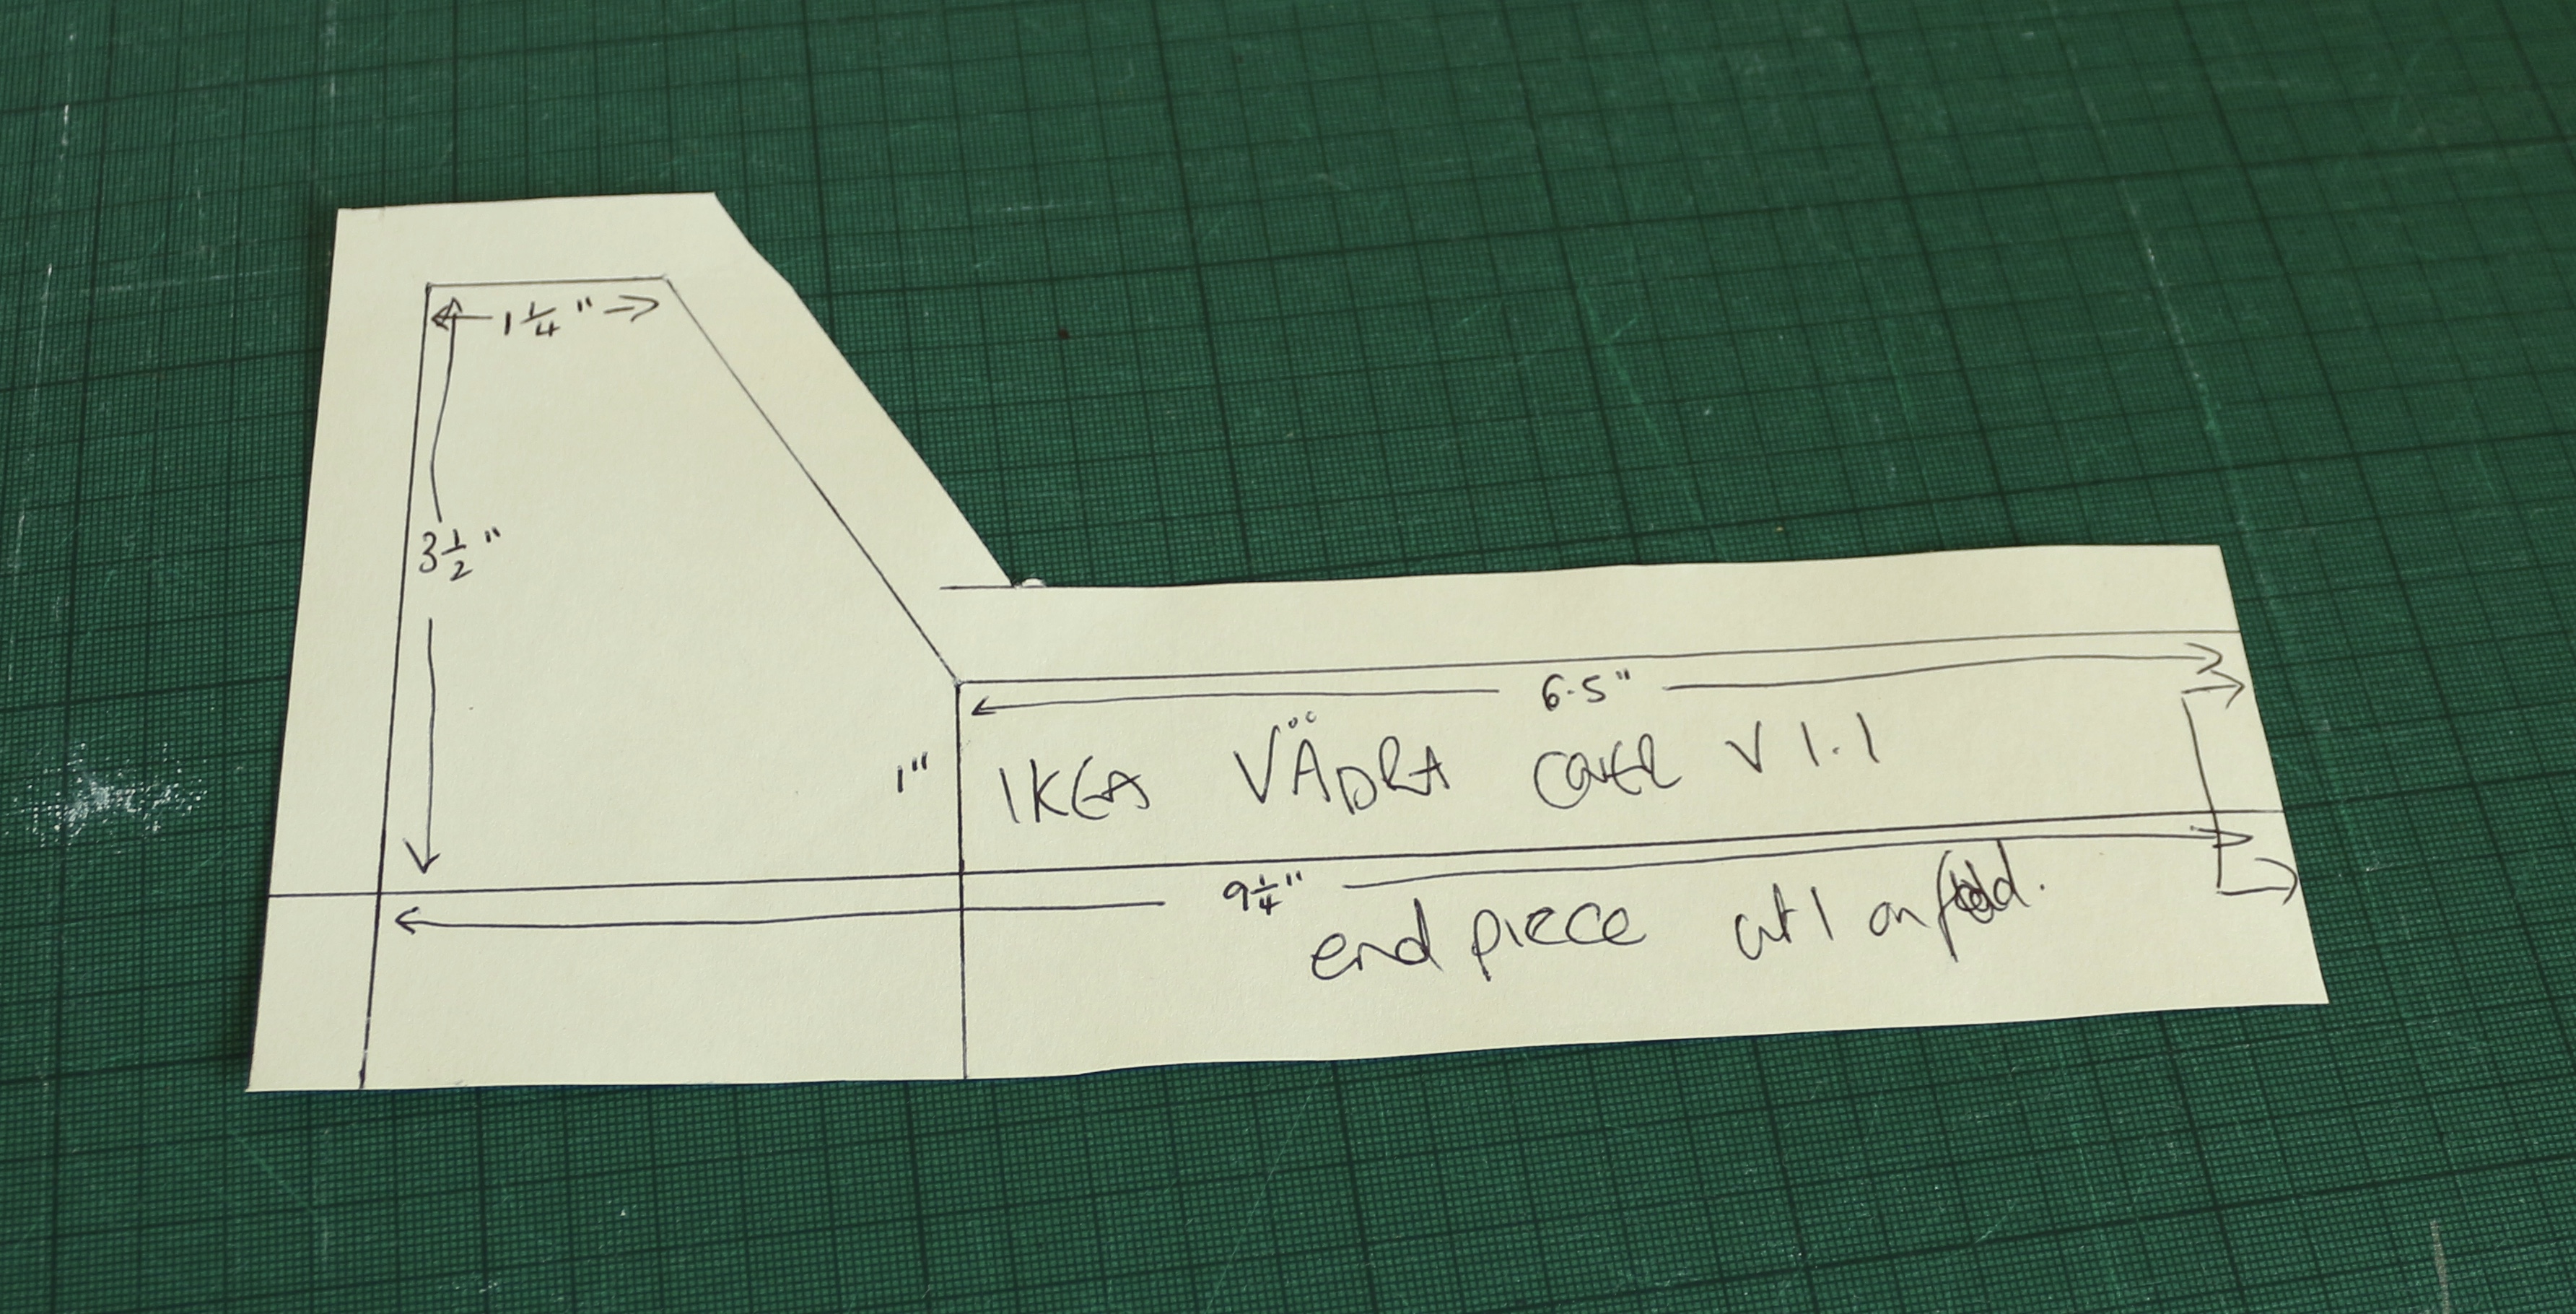
The seams were all sewn with a 1/2″ seam allowance, but around the base I left 1″ extra, and sewed some 1″ foldover elastic around the base, pulling it slightly taut as I went, except around the corners which I pulled tight.
The result?

Yey! A nice bright cover! This one in particular is flannel cotton so should be super soft, and able to be washed easily in case we have any accidents. I also used up some more fabric from my stash to make some extras:
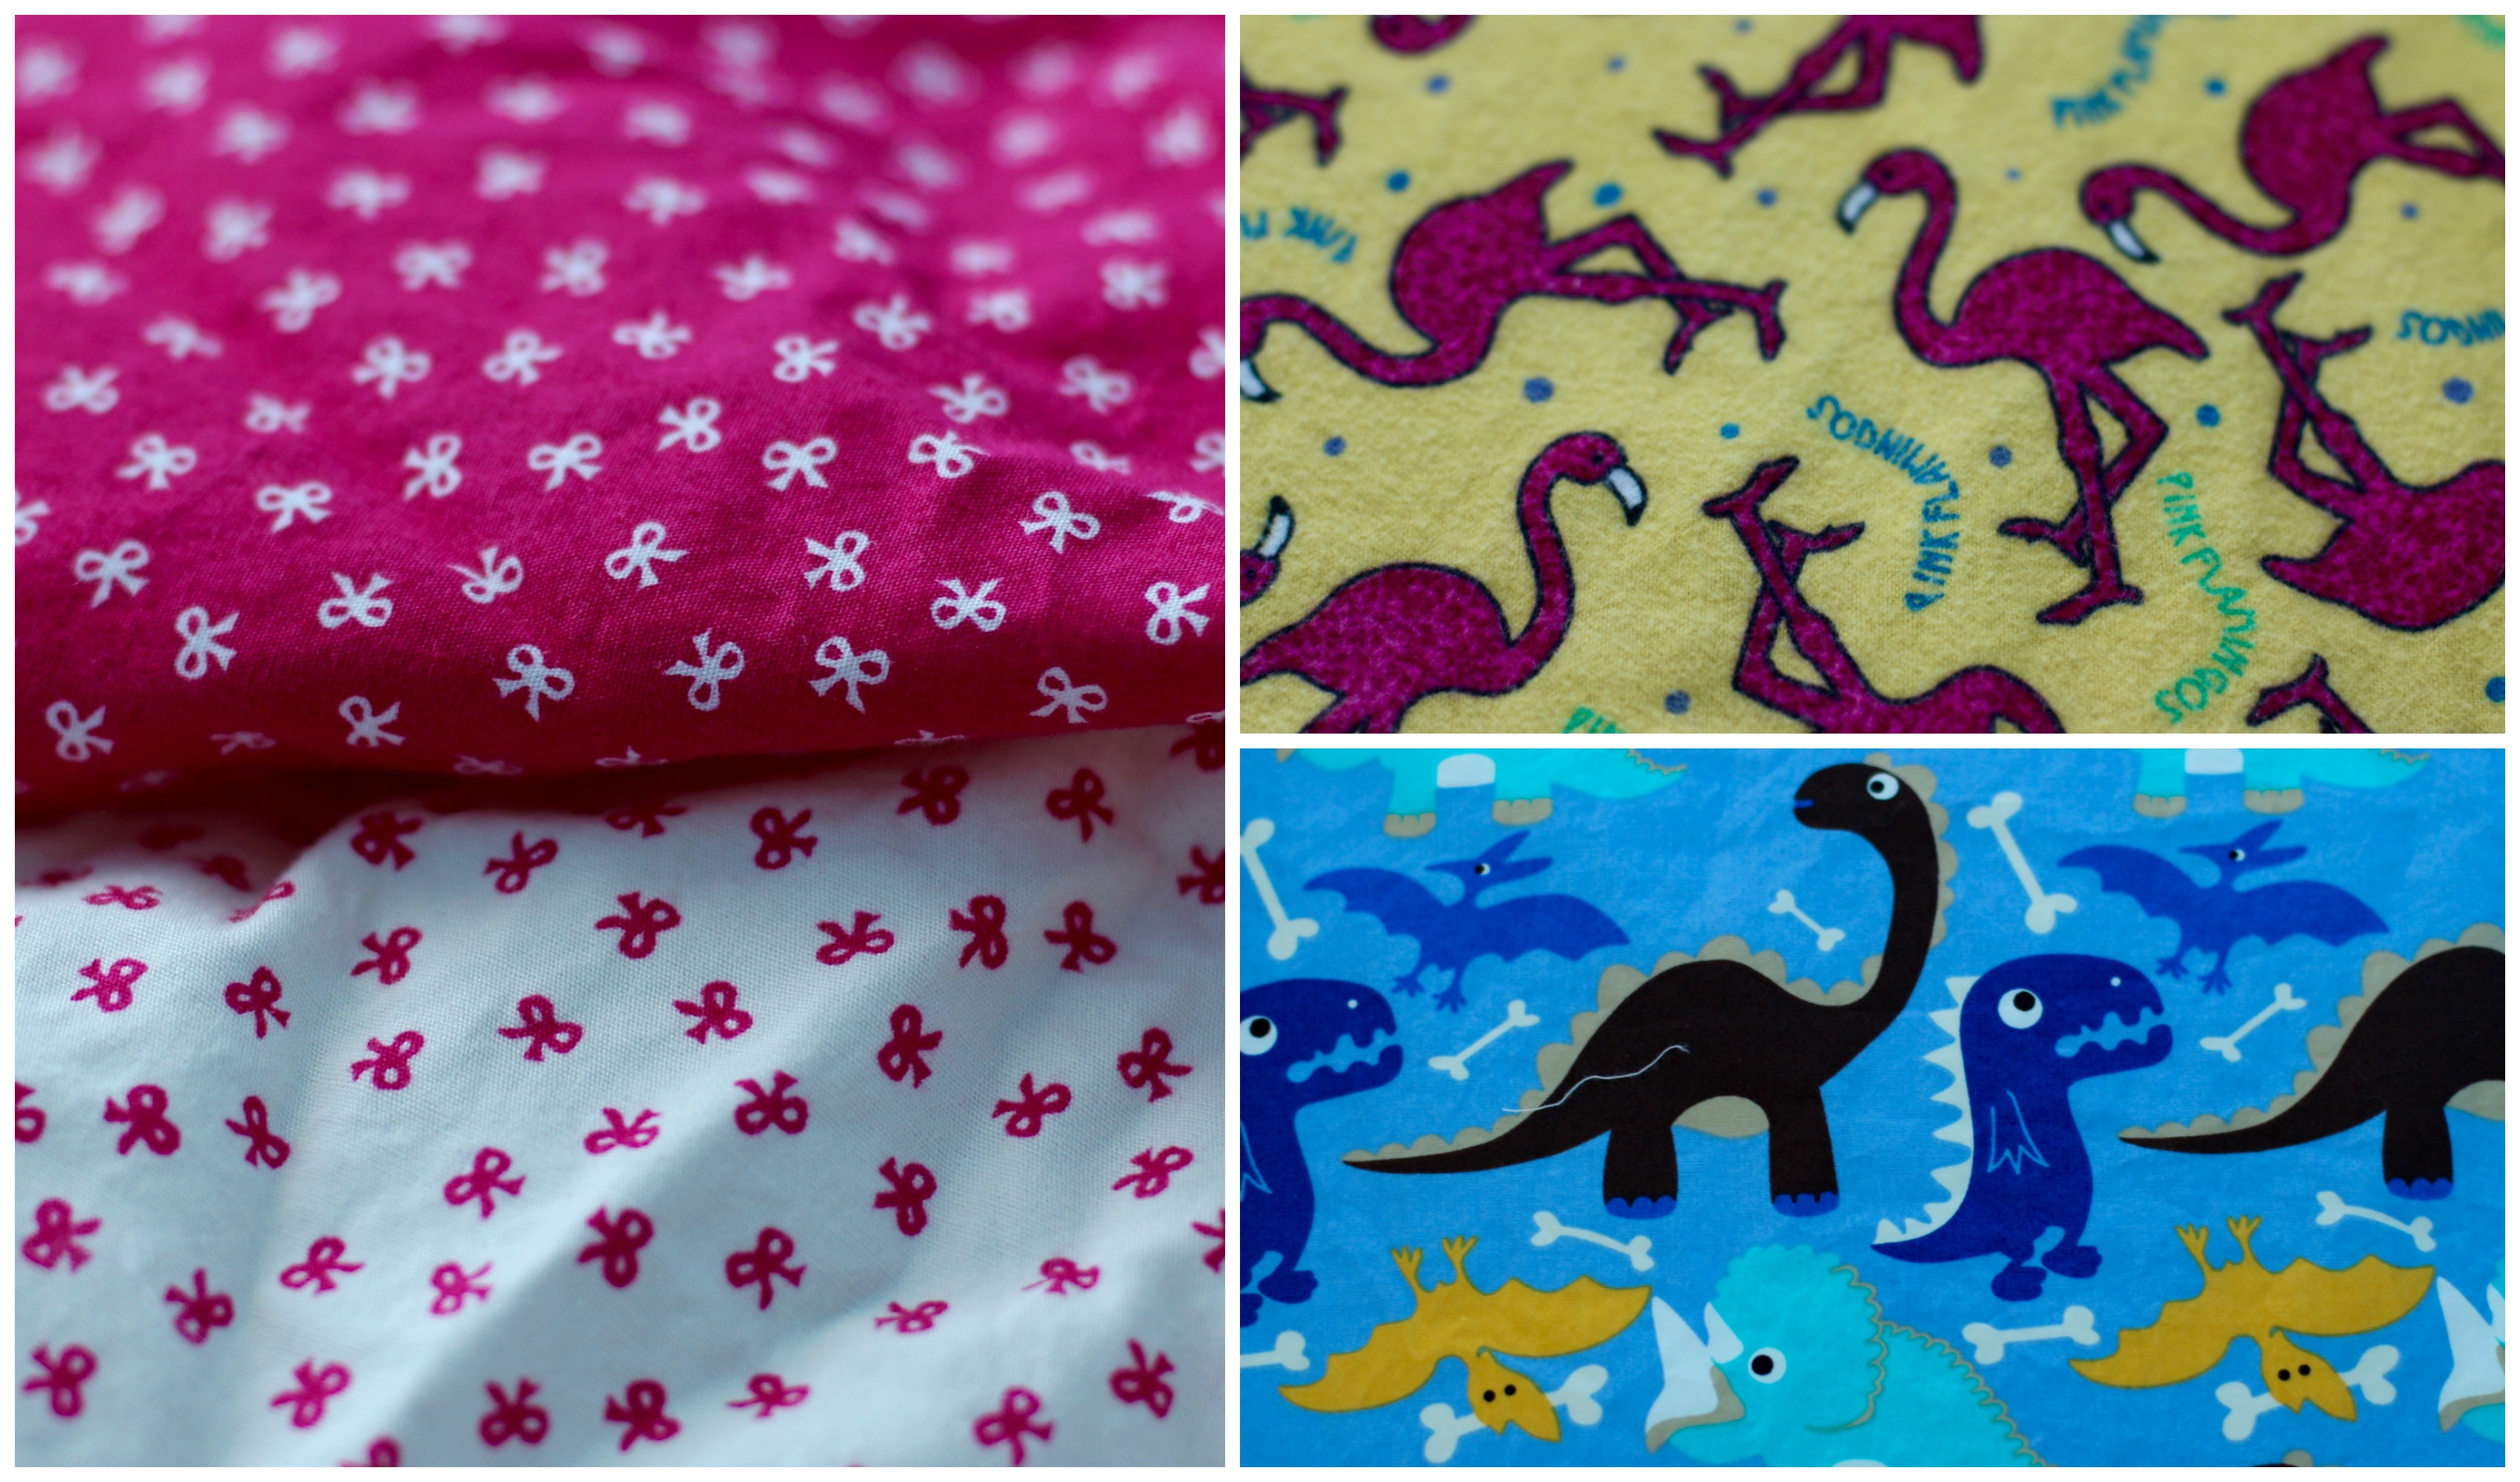
Bright and colourful!
I was working on another crochet octopus, so that Baby M could have one to match her future bestie…. But this week I woke up with total agony in my right hand…… It seems my latest weird pregnancy symptom to come up is Carpal Tunnel, so I now have a stylish wrist brace and will have to take it easy!


Wow. That cover is amazing! Hope your hand gets better soon.
Thank you! I am trying to alternately rest/ice/stretch it to minimise the pain and discomfort, I just have another couple of weeks at work left.
And I think the fabric really makes it with these things, fun and bright!
Are you happy to share your measurements and templatesm
I am afraid I am not technologically advanced enough to be able to put together a downloadable pattern, but if you look at the images in the post each measurement is marked out on the pattern pieces.
I drew them out on some reasonably sturdy paper (one of those big rolls from IKEA), and then used those to cut the pattern pieces.
Perfect! This is exactly what I want to do! Hopefully my math will be as successful as yours! 🤞
They have come in very useful, especially as we have two mats in use, one upstairs and one downstairs, and they have proved useful as a secondary bed type surface for her to lie (and vomit on) when she was poorly! I ended up making a few more in fact.
Also, how did you finish the back?
For the seams I used my serger to finish all the edges, you can zigzag if you don’t have one. The bottom edges are finished with fold over elastic to hold it on to the mat.
Awesome thank you! I’ve just finished my prototype. I’m definitely going to make more in fun, cute fabrics! Thank you again! Couldn’t have done it with out your template example!
Thank you! If I was more technologically savvy I would make it into a proper pattern to print, but alas I am not.
Do you have an Instagram account ? 🙂 I want to tag you in my finished product!
Yep. Just lindsay.marsh
Oh thank you thank you for doing this so I don’t have to! I just spent about an hour trying to figure this out and it’s hurting my brain, so I am super grateful to you for doing it for me!
No problem! I ended up making lots of them in the end, easy to whip off and into the wash if there were any changing accidents!
Hi! Love this! Tried it out and mine is a little sloppy. I think i can fix it in my seam allowance. Can you post a picture from the elastic? I’m wondering how that looks like.
I did two different variations on the elastic bottom, either by zigzagging some 1/4” elastic along the bottom edge, or using fold over elastic enclosing the edge. Just be sure to stretch out your elastic at the corners to ensure it pulls those in tight.
Does your pattern include the 1/2” seam allowance or did you add outside the pattern piece when cutting?
The template I made included the 1/2” seam allowance. If you look at the picture of the pattern piece, I drew 1/2” of seam allowance on all the stitching lines, with 1” extra along the bottom edge so there was a little extra to go under the base of the mat.
I really should figure out how to make it into a real pattern!
So the solid line is the stitching line and the edge of the paper is the seam allowance?
Yep, that’s right. Hope that makes sense.
How much Fabric did you use? Im a bloody beginner and cant realy tell how much is being used. Also how do i get the angels in the third Picture of the Pattern..?
Each cover is made from less than a yard of fabric, but I am afraid I couldn’t tell you exactly how much. As for the angles, I would recommend drawing out all the straight lines first with the correct measurements, then the angled lines are just what joins all of those together.